Introduction
When it comes to monitoring the environment, having accurate temperature and humidity readings is crucial. The SHT31 sensor is a high-precision temperature and humidity sensor that can help you achieve that. This article will dive into environmental sensing and explore how to interface the SHT31 sensor with an Arduino microcontroller. From wiring and coding to data visualization, this guide will take you through everything you need to know to get started with the SHT31 sensor.
The environment around us is constantly changing, and understanding these changes is key to making informed decisions. The SHT31 sensor is a powerful tool that can help you monitor the temperature and humidity of your surroundings with high precision. Whether you’re creating an intelligent home system, monitoring a greenhouse, or want to track the weather, the SHT31 sensor and Arduino are a winning combination. So, come with us as we embark on a journey to understand the secrets of the environment through the SHT31 sensor and Arduino.
What is SHT31 Temperature Sensor?
Temperature & Humidity Sensor SHT31 is an integrated temperature & humidity sensor that is precise, quick, and reliable. For relative humidity, this module typically has an accuracy of 2%RH, and for temperature, 0.3°C. This module can operate on either 3.3 or 5 volts.

Hardware Components
You will require the following hardware for Interfacing SHT31 Temperature Humidity Sensor with Arduino.
| S.no | Component | Value | Qty |
|---|---|---|---|
| 1. | Arduino UNO | – | 1 |
| 2. | Temperature Humidity Sensor | SHT31 | 1 |
| 3. | Breadboard | – | 1 |
| 4. | Jumper Wires | – | 1 |
SHT31 Sensor with Arduino
It’s now time for the interface. So, follow the given steps:
Schematic
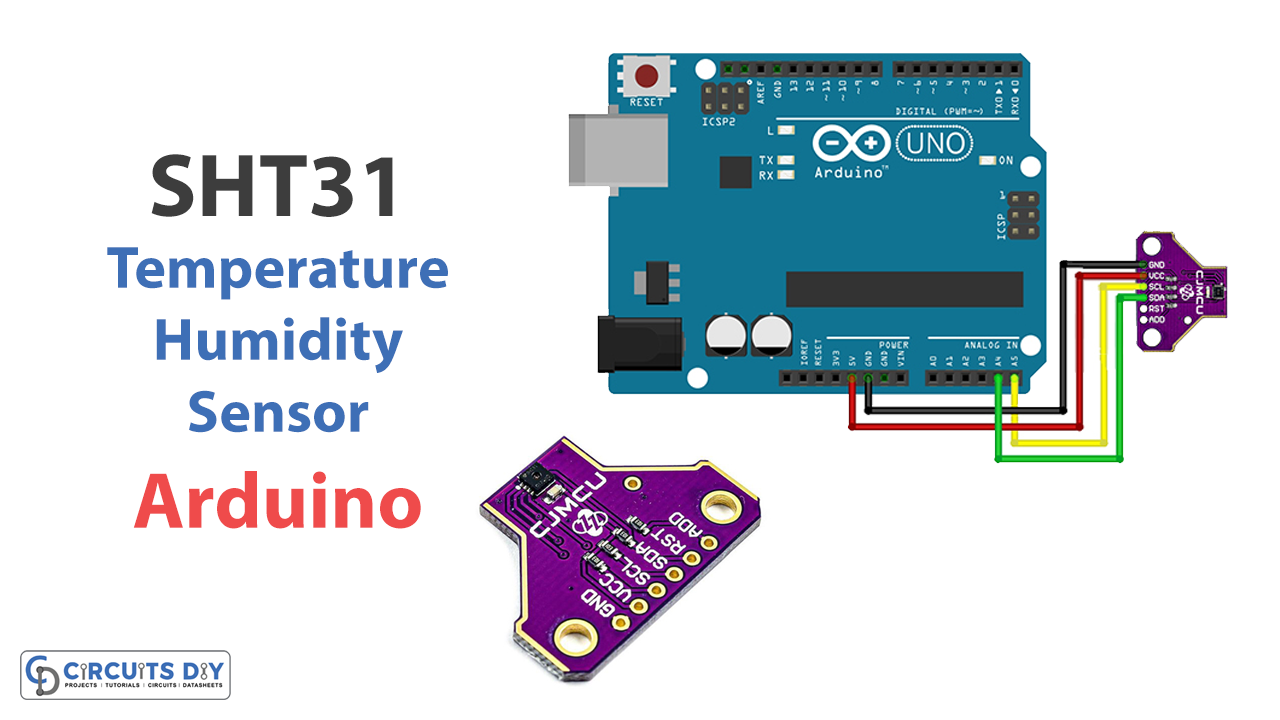
Make connections according to the circuit diagram given below.

Wiring / Connections
| Arduino | Temperature Sensor |
|---|---|
| 5V | VCC |
| GND | GND |
| A4 | SDA |
| A5 | SCL |
Installing Arduino IDE
First, you need to install Arduino IDE Software from its official website Arduino. Here is a simple step-by-step guide on “How to install Arduino IDE“.
Installing Libraries
Before you start uploading a code, download and unzip the following libraries at /Progam Files(x86)/Arduino/Libraries (default), in order to use the sensor with the Arduino board. Here is a simple step-by-step guide on “How to Add Libraries in Arduino IDE“.
Code
Now copy the following code and upload it to Arduino IDE Software.
#include <Arduino.h>
#include <Wire.h>
#include "Adafruit_SHT31.h"


Adafruit_SHT31 sht31 = Adafruit_SHT31();

void setup() {
  Serial.begin(9600);

  while (!Serial)
    delay(10);     // will pause Zero, Leonardo, etc until serial console opens

  Serial.println("SHT31 test");

  //Set to 0x45 for alternate i2c addr
  if (! sht31.begin(0x44)) {
    Serial.println("Couldn't find SHT31");
    while (1) delay(1);
  }
}


void loop() {
  float t = sht31.readTemperature();
  float h = sht31.readHumidity();

  // check if 'is not a number'
  if (! isnan(t)) {
    Serial.print("Temperature = ");
    Serial.print(t);
    Serial.print("*C");
    Serial.print("\t\t");
  }
  else {
    Serial.println("Failed to read temperature");
  }

  // check if 'is not a number'
  if (! isnan(h)) {
    Serial.print("Humidity = %");
    Serial.println(h);
  }
  else {
    Serial.println("Failed to read humidity");
  }

  delay(1000);
}
Let’s Test It
Upload the code to the Arduino board, and connect the sensor’s wires to the Arduino board according to the SHT31 sensor’s datasheet. Once the connection is made, open the serial monitor. You should see the temperature and humidity values being printed to the serial monitor every second
Working Explanation
To understand the code, let us dive deep into the coding:
- First, we include the necessary libraries for the Arduino board (Arduino.h), for communicating over the I2C bus (Wire.h), and for the specific SHT31 sensor (Adafruit_SHT31.h).
- Then, we create an object of the Adafruit_SHT31 class, which will allow us to communicate with the sensor.
- In the void setup, we start the serial communication with a baud rate of 9600 and print the “SHT31 test” to the serial monitor. We check if the sensor is present on the I2C bus, by calling sht31.begin(0x44), which returns true if the sensor is found, and false otherwise. If the sensor is not found, the code will wait in an infinite loop.
- In the void loop we read the temperature and humidity values from the sensor by calling the functions sht31.readTemperature() and sht31.readHumidity(). These functions return the temperature and humidity values as floating point numbers.
- Then, we check if the values returned by the sensor are valid by using the isnan() function, which returns true if the passed value is not a number. If the value is valid, it prints it to the serial monitor. Otherwise, it prints an error message.
- Lastly, we use delay(1000) to wait for 1 second before repeating the process of reading and printing the temperature and humidity values.
The code will continuously read temperature and humidity values from the SHT31 sensor and print the values to the serial monitor every second.
Applications
- Weather stations
- Monitoring industrial and agricultural products
- Pharmaceutical processing equipment
Conclusion.
We hope you have found this Interfacing SHT31 Temperature Humidity Sensor with Arduino Circuit very useful. If you feel any difficulty in making it feel free to ask anything in the comment section.