Introduction
Interfacing an Arduino UNO with an IR obstacle avoidance sensor is a popular project for beginners in the world of electronics and programming. IR sensors are commonly used in various applications such as robotics, automation, and security systems to detect the presence of obstacles and trigger an action. With an Arduino UNO board and an IR obstacle avoidance sensor, one can build a simple and cost-effective obstacle avoidance system that can detect and respond to objects in real time. In this way, the project provides a great platform for learning about electronics, programming, and the practical application of sensors.
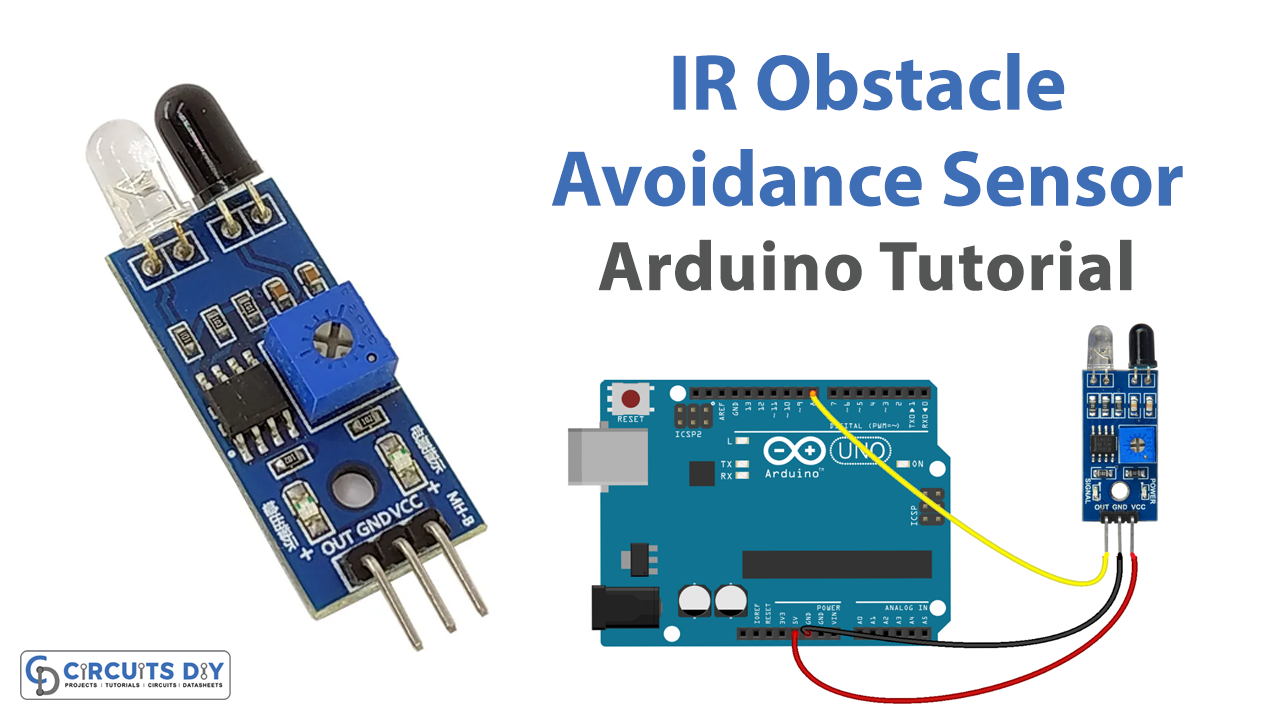
The HW201 IR Infrared Obstacle Avoidance Sensor Module is a sensor module designed to detect obstacles and avoid a collision. It uses infrared (IR) technology to detect the presence of obstacles and provides a digital output to indicate the presence or absence of an obstacle. The module consists of an IR transmitter and an IR receiver, and it can detect objects at a distance of up to 30cm.
Hardware Components
You will require the following hardware for Interfacing Infrared Obstacle Avoidance Sensor with Arduino.
| S.no | Component | Value | Qty |
|---|---|---|---|
| 1. | Arduino UNO | – | 1 |
| 2. | USB Cable Type A to B | – | 1 |
| 3. | IR Obstacle Avoidance Sensor | – | 1 |
| 4. | Power Adapter for Arduino | 9V | 1 |
| 5. | Jumper Wires | – | 1 |
Infrared Obstacle Avoidance Sensor with Arduino
- Declare the IR sensor pin as a constant variable:
const int IR_SENSOR_PIN = 8;
This code declares the variable IR_SENSOR_PIN as a constant integer with a value of 8, representing the pin that the IR sensor is connected to on the Arduino board.
- Initialize serial communication and pin mode in the
setup()function:
void setup() {
  Serial.begin(9600);
  pinMode(IR_SENSOR_PIN, INPUT);
}
This code initializes the serial communication at a baud rate of 9600 and sets the IR sensor pin as an input. The Serial.begin(9600) function sets up a serial connection between the Arduino board and the computer, allowing the board to communicate with the Serial Monitor in the Arduino IDE.
- Read the state of the input pin in the
loop()function:
void loop() {
  int state = digitalRead(IR_SENSOR_PIN);
This code reads the state of the IR sensor pin and stores it in the state variable. The digitalRead() function reads the voltage level on the specified pin (HIGH or LOW) and returns the value as an integer.
- Check the state of the input pin and print a message to the Serial Monitor:
if (state == LOW)
  Serial.println("The obstacle is present");
else
  Serial.println("The obstacle is NOT present");
This code checks the value of the state variable and prints a message to the Serial Monitor depending on whether an obstacle is detected or not. If the voltage on the input pin is LOW (meaning an obstacle is present), the message “The obstacle is present” will be printed. If the voltage on the input pin is HIGH (meaning no obstacle is present), the message “The obstacle is NOT present” will be printed.
- Add a delay to the loop function:
delay(100);
This code adds a 100-millisecond delay to the loop() function to prevent the Arduino board from reading the input pin too quickly and flooding the Serial Monitor with messages.
Schematic
Make connections according to the circuit diagram given below.

Wiring / Connections
| Arduino | Sensor |
|---|---|
| 5V | VCC |
| GND | GND |
| D8 | OUT |
Installing Arduino IDE
First, you need to install Arduino IDE Software from its official website Arduino. Here is a simple step-by-step guide on “How to install Arduino IDE“.
Code
Now copy the following code and upload it to Arduino IDE Software.
const int IR_SENSOR_PIN = 8;

void setup() {
  // initialize serial communication at 9600 bits per second:
  Serial.begin(9600);
  // initialize the Arduino's pin as aninput
  pinMode(IR_SENSOR_PIN, INPUT);
}

void loop() {
  // read the state of the the input pin:
  int state = digitalRead(IR_SENSOR_PIN);

  if (state == LOW)
    Serial.println("The obstacle is present");
  else
    Serial.println("The obstacle is NOT present");

  delay(100);
}
Working Explanation
In the setup() function, the serial communication is initialized at a baud rate of 9600 using the Serial.begin() function. Additionally, the IR_SENSOR_PIN is set as an input using the pinMode() function.
In the loop() function, the digitalRead() function is used to read the state of the IR_SENSOR_PIN. If the state is LOW, it means that an obstacle is present, so the message “The obstacle is present” is printed to the serial monitor using the Serial.println() function. If the state is HIGH, it means that no obstacle is present, so the message “The obstacle is NOT present” is printed to the serial monitor. Finally, a delay of 100 milliseconds is introduced using the delay() function before the loop starts again, to avoid rapidly repeating reads from the sensor.
Applications
- Security systems
- Automation systems
- Smart homes
- Proximity detection systems
- Traffic control systems
- Industrial automation
- Touchless switches
- Sanitary and hygiene equipment
Conclusion.
We hope you have found this Infrared Obstacle Avoidance Sensor Circuit very useful. If you feel any difficulty in making it feel free to ask anything in the comment section.