Hardware Components
| Component | Model / Type | Qty |
|---|---|---|
| Arduino UNO | R3 Board | 1 |
| OLED Display | SSD1306 128×64 I2C (0.96″) | 1 |
| Joystick Module | Analog X/Y + Pushbutton | 1 |
| Breadboard | Full-size or half-size | 1 |
| Jumper Wires | Male-to-male | 1 set |
| USB Cable | For Arduino UNO (Type B) | 1 |
How It Works ?
- The analog X and Y values are read from pins A0 and A1.
- The push button is read from digital pin D2.
- Analog values are mapped to pupil movement ranges (
-7to+7).
Drawing Eyes
- Two large eye outlines are drawn at fixed positions.
- Pupils are drawn inside those eyes based on joystick input.
Button = Blink
- If the button is pressed, instead of pupils, two eyelids (lines) are drawn.
- This simulates a “blinking” action.
OLED Display Update
Schematic
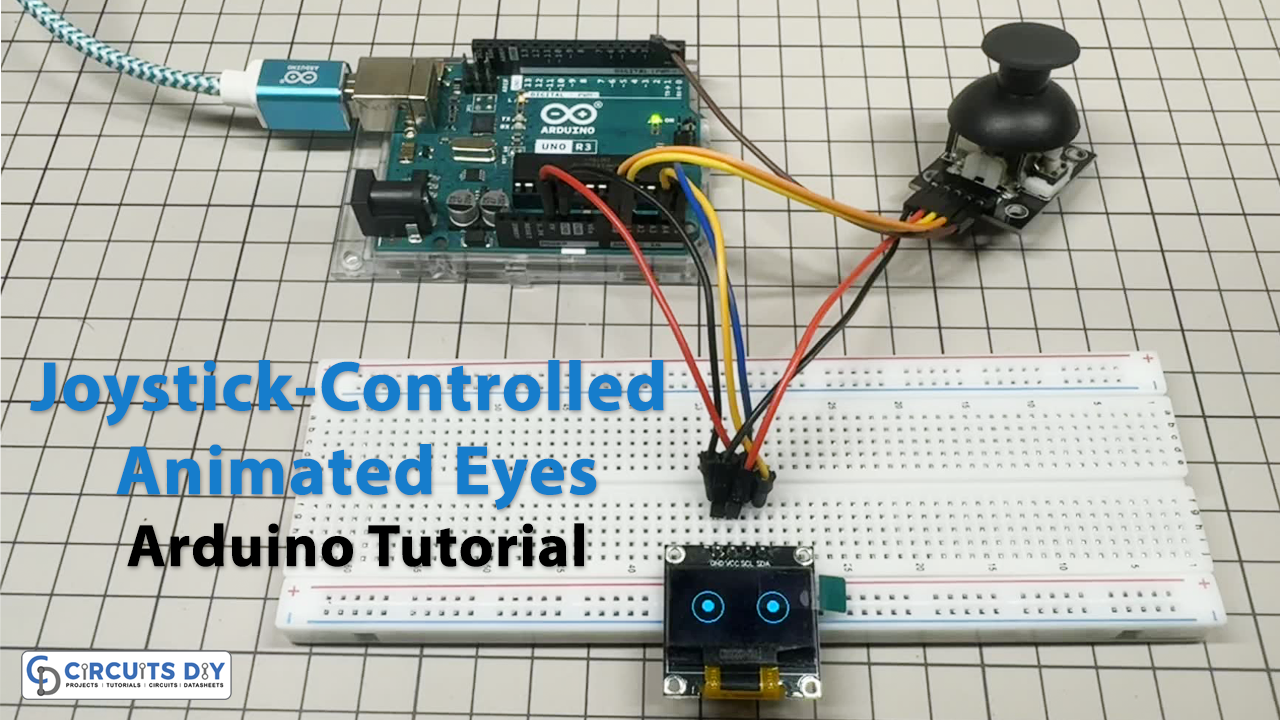
Wiring / Connections
| Arduino UNO | Joystick | OLED (SSD1306) |
|---|---|---|
| A0 | X-axis output | – |
| A1 | Y-axis output | – |
| D2 | Button (SW pin) | – |
| 5V | VCC | VCC |
| GND | GND | GND |
| A4 | – | SDA |
| A5 | – | SCL |
Arduino Code
#include <Adafruit_GFX.h>
#include <Adafruit_SSD1306.h>

#define SCREEN_WIDTH 128
#define SCREEN_HEIGHT 64
#define OLED_RESET    -1
Adafruit_SSD1306 display(SCREEN_WIDTH, SCREEN_HEIGHT, &Wire, OLED_RESET);

// Joystick pins
#define JOYSTICK_X A0
#define JOYSTICK_Y A1
#define JOYSTICK_BUTTON 2

void setup() {
  pinMode(JOYSTICK_BUTTON, INPUT_PULLUP);

  if (!display.begin(SSD1306_SWITCHCAPVCC, 0x3C)) {
    Serial.println(F("SSD1306 allocation failed"));
    for (;;);
  }

  display.clearDisplay();
  display.display();
}

void drawEye(int x, int y) {
  display.drawCircle(32, 32, 15, SSD1306_WHITE); // Left eye
  display.drawCircle(96, 32, 15, SSD1306_WHITE); // Right eye

  display.fillCircle(32 + x, 32 + y, 5, SSD1306_WHITE); // Left pupil
  display.fillCircle(96 + x, 32 + y, 5, SSD1306_WHITE); // Right pupil
}

void drawEyelids() {
  display.drawLine(17, 32, 47, 32, SSD1306_WHITE);  // Left lid
  display.drawLine(81, 32, 111, 32, SSD1306_WHITE); // Right lid
}

void loop() {
  int joystickX = analogRead(JOYSTICK_X);
  int joystickY = analogRead(JOYSTICK_Y);
  bool buttonPressed = !digitalRead(JOYSTICK_BUTTON);

  int pupilX = map(joystickX, 0, 1023, -7, 7);
  int pupilY = map(joystickY, 0, 1023, -7, 7);

  display.clearDisplay();

  if (buttonPressed) {
    drawEyelids(); // Close eyes
  } else {
    drawEye(pupilX, pupilY); // Move pupils
  }

  display.display();
  delay(50);
}