Introduction
Interfacing a Light-dependent resistor (LDR) with an Arduino UNO to check whether the environment is dim, dark, light, or bright, is a powerful and cost-effective solution for detecting changes in ambient light levels. The LDR, also known as a photoresistor, is a type of resistor that changes its resistance based on the amount of light that falls on it. The Arduino UNO microcontroller board is used to read the resistance of the LDR and determine the level of ambient light.
This system can be easily integrated into a wide range of projects such as street lighting, security cameras, or other projects where it is important to detect changes in the ambient light level. The LDR is simple to interface and requires minimal external components, making it an ideal choice for beginners and experienced makers alike.
Hardware Components
You will require the following hardware for Interfacing LDR Light Sensor with Arduino.
| S.no | Component | Value | Qty |
|---|---|---|---|
| 1. | Arduino UNO | – | 1 |
| 2. | USB Cable Type A to B | – | 1 |
| 3. | Light Sensor | – | 1 |
| 4. | Power Adapter for Arduino | 9V | 1 |
| 5. | Resistor | 10kΩ | 1 |
| 6. | Breadboard | – | 1 |
| 7. | Jumper Wires | – | 1 |
Light Sensor with Arduino
- Connect the LDR to the Arduino using the analog pin specified in the LDR’s documentation.
- In the Arduino IDE, create variables to store the analog value read from the LDR and the environment status:
int ldrValue = 0;
String environment = "";
- In the setup() function, initialize the serial communication:
Serial.begin(9600);
- In the loop() function, read the analog value from the LDR using the analogRead() function:
ldrValue = analogRead(A0);
- Check the LDR value and determine the environment status:
if (ldrValue < 100) {
  environment = "Dark";
} else if (ldrValue < 300) {
  environment = "Dim";
} else if (ldrValue < 600) {
  environment = "Light";
} else {
  environment = "Bright";
}
- Send the environment status to the serial monitor using the Serial.println() function:
Serial.println(environment);Schematic
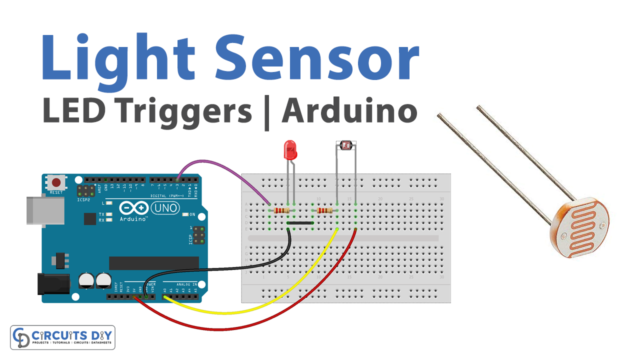
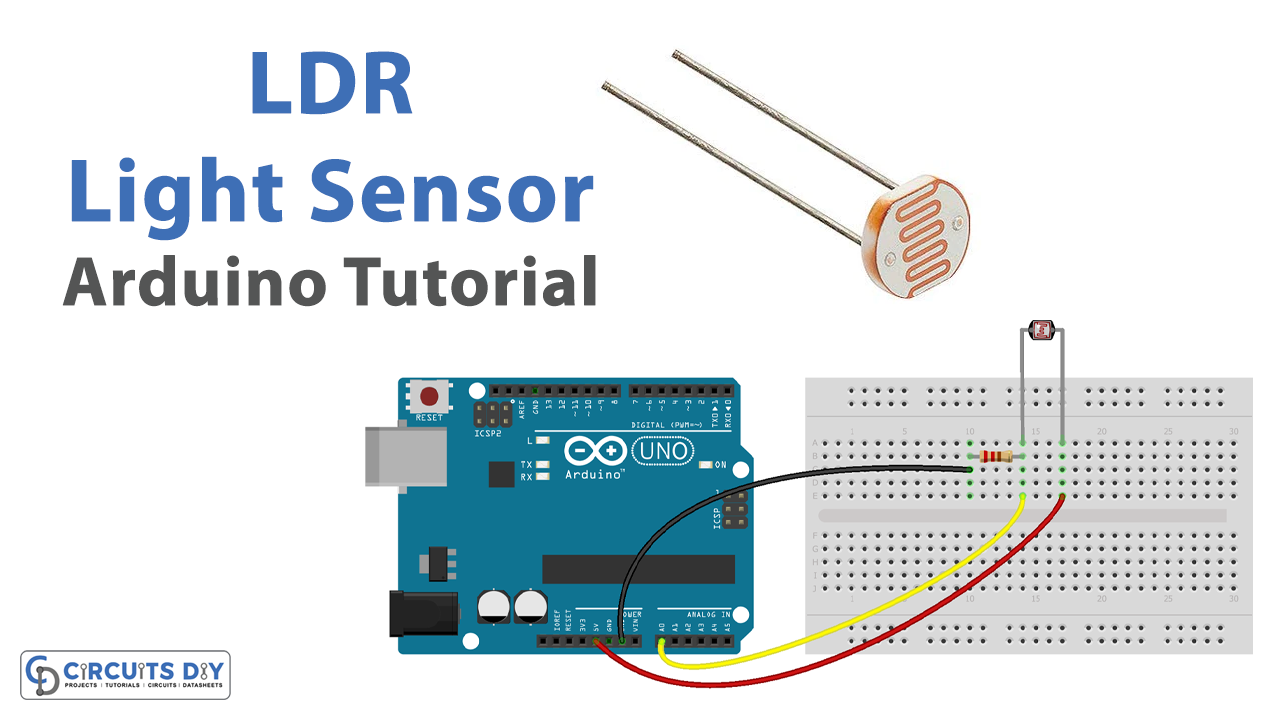
Make connections according to the circuit diagram given below.

Wiring / Connections
| Arduino | Light Sensor |
|---|---|
| 5V | Pin1 |
| GND | Pin2 with 220 OHM ground |
| A0 | Yellow |
Installing Arduino IDE
First, you need to install Arduino IDE Software from its official website Arduino. Here is a simple step-by-step guide on “How to install Arduino IDE“.
Code
Now copy the following code and upload it to Arduino IDE Software.
void setup() {
  // initialize serial communication at 9600 bits per second:
  Serial.begin(9600);
}

void loop() {
  // reads the input on analog pin A0 (value between 0 and 1023)
  int analogValue = analogRead(A0);

  Serial.print("Analog reading: ");
  Serial.print(analogValue);   // the raw analog reading

  // We'll have a few threshholds, qualitatively determined
  if (analogValue < 10) {
    Serial.println(" - Dark");
  } else if (analogValue < 200) {
    Serial.println(" - Dim");
  } else if (analogValue < 500) {
    Serial.println(" - Light");
  } else if (analogValue < 800) {
    Serial.println(" - Bright");
  } else {
    Serial.println(" - Very bright");
  }

  delay(500);
}
Working Explanation
The Arduino sketch starts by including variables to store the LDR’s resistance value and the environment status. The LDR is connected to the Arduino using one of its analog inputs. In the setup() function, the serial communication is initialized with a baud rate of 9600.
In the loop() function, the analog value of the LDR is read by calling the analogRead() function on the LDR’s pin. The analog value is then stored in a variable. After that, the code checks the value of the LDR and compares it with different thresholds to determine the environmental status, whether it is dim, dark, light, or bright. The code assigns different String values to the environment status variable depending on the range of the LDR’s value.
Applications
- Street lighting
- Security cameras
- Automotive
- Indoor lighting
- Plant growth
- Astronomy
- Photovoltaic systems
Conclusion
We hope you have found this LDR Light Sensor Circuit very useful. If you feel any difficulty in making it feel free to ask anything in the comment section.