Introduction
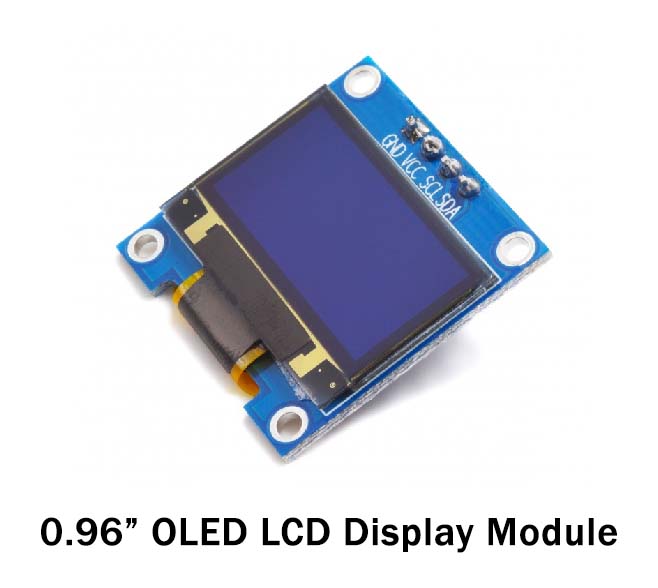
Interfacing an I2C SSD1306 OLED module using an Arduino Uno microcontroller is a simple yet powerful way to create interactive projects that can display information and receive input from a user. An SSD1306 OLED module is a small, low-power display that can be used to show text, graphics, and other information. The module is equipped with an OLED screen, the SSD1306 controller, and a small number of passive components, they can be connected to a microcontroller using different communication protocols such as I2C, SPI, UART, or parallel.
The OLED module communicates with the Arduino UNO MCU using the I2C protocol, which is a two-wire communication protocol that uses a clock (SCL) and data (SDA) line. The OLED module has a unique I2C address which is used to communicate with it.
Hardware Components
You will require the following hardware for Interfacing Arduino – Button Count – OLED with Arduino.
| S.no | Component | Value | Qty |
|---|---|---|---|
| 1. | Arduino UNO | – | 1 |
| 2. | USB Cable Type A to B | – | 1 |
| 3. | Button | – | 1 |
| 4. | I2C OLED Display 128×64 | SSD1306 | 1 |
| 5. | Power Adapter for Arduino | 9V | 1 |
| 6. | Breadboard | – | 1 |
| 7. | Jumper Wires | – | 1 |
OLED Button Count with Arduino
- Import the necessary libraries at the top of the sketch. These include the Adafruit_SSD1306 and Adafruit_GFX libraries for controlling the OLED module, and the Wire library for I2C communication.
#include <Wire.h>
#include <Adafruit_SSD1306.h>
#include <Adafruit_GFX.h>
- Declare an Adafruit_SSD1306 object and initialize it with the OLED’s dimensions and I2C address. Also, declare a variable to store the state of the pushbutton.
Adafruit_SSD1306 oled(128, 64, &Wire, 0x3C);
int buttonPin = 2;  // pushbutton pin
- In the
setup()function, initialize the serial communication at a baud rate of 9600, and initialize the OLED by calling thebegin()andclearDisplay()functions. Also, configure the pushbutton pin as an input with a pull-up resistor.
void setup() {
  Serial.begin(9600);
  oled.begin(SSD1306_SWITCHCAPVCC, 0x3C);
  oled.clearDisplay();
  pinMode(buttonPin, INPUT_PULLUP);
}
- In the
loop()function, read the state of the pushbutton using thedigitalRead()function and store it in thebuttonStatevariable, also perform the corresponding OLED module functions when the pushbutton is set to HIGH.
void loop() {
  buttonState = digitalRead(buttonPin);
  if (buttonState == LOW) {
    // clear the display
    oled.clearDisplay();
    // display "Button pressed" on the OLED
    oled.setCursor(0,0);
    oled.println("Button pressed");
    oled.display();
    // send "Button pressed" to the serial monitor
    Serial.println("Button pressed");
  } else {
    // clear the display
    oled.clearDisplay();
    // display "Button released" on the OLED
    oled.setCursor(0,0);
    oled.println("Button released");
    oled.display();
    // send "Button released" to the serial monitor
    Serial.println("Button released");
  }
  delay(200); // add a delay to avoid rapid refresh
}
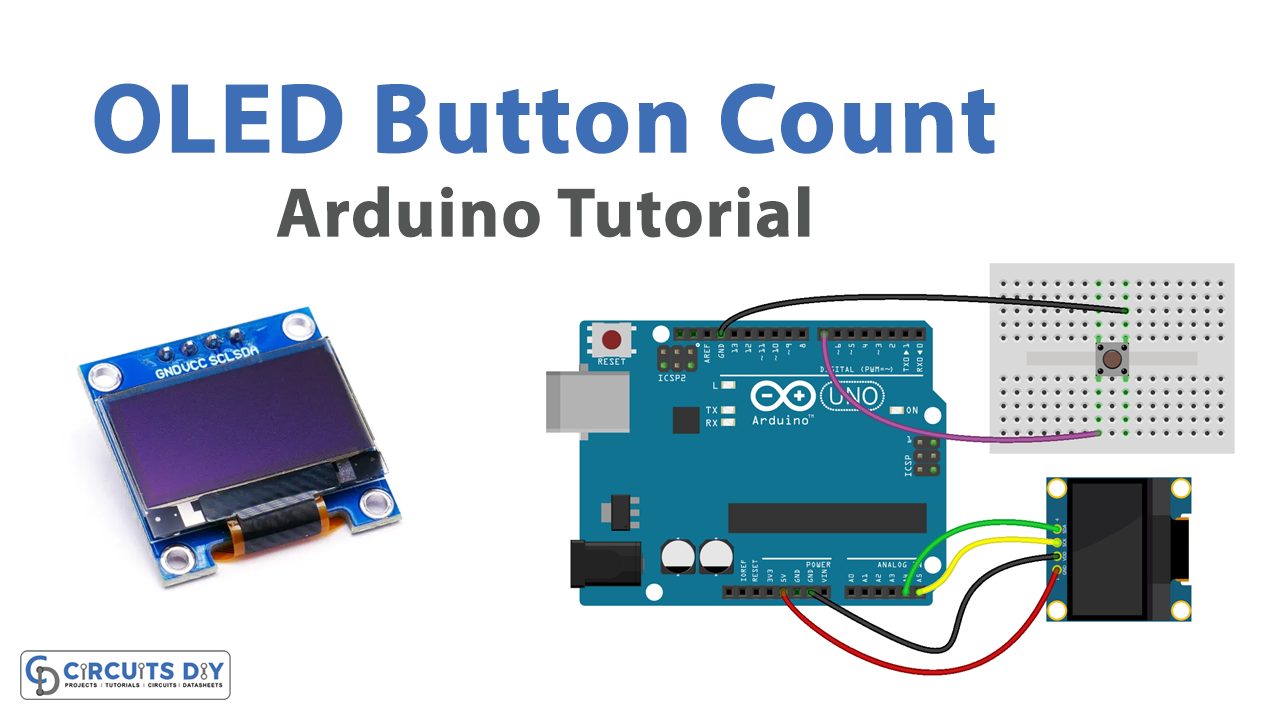
Schematic
Make connections according to the circuit diagram given below.

Wiring / Connections
| Arduino | OLED |
|---|---|
| 5V | VCC |
| GND | GND |
| A4 | SDA |
| A5 | SCL |
Installing Arduino IDE
First, you need to install Arduino IDE Software from its official website Arduino. Here is a simple step-by-step guide on “How to install Arduino IDE“.
Installing Libraries
Before you start uploading a code, download and unzip the following libraries at /Progam Files(x86)/Arduino/Libraries (default), in order to use the sensor with the Arduino board. Here is a simple step-by-step guide on “How to Add Libraries in Arduino IDE“.
Code
Now copy the following code and upload it to Arduino IDE Software.
#include <Wire.h>
#include <Adafruit_GFX.h>
#include <Adafruit_SSD1306.h>
#include <ezButton.h>

#define SCREEN_WIDTH 128 // OLED display width,  in pixels
#define SCREEN_HEIGHT 64 // OLED display height, in pixels


Adafruit_SSD1306 oled(SCREEN_WIDTH, SCREEN_HEIGHT, &Wire, -1); // create SSD1306 display object connected to I2C
ezButton button(7);  // create ezButton object that attach to pin 7;
unsigned long lastCount = 0;
void setup() {
  Serial.begin(9600);

  // initialize OLED display with address 0x3C for 128x64
  if (!oled.begin(SSD1306_SWITCHCAPVCC, 0x3C)) {
    Serial.println(F("SSD1306 allocation failed"));
    while (true);
  }

  delay(2000);         // wait for initializing
  oled.clearDisplay(); // clear display

  oled.setTextSize(2);          // text size
  oled.setTextColor(WHITE);     // text color
  oled.setCursor(0, 10);        // position to display

  button.setDebounceTime(50); // set debounce time to 50 milliseconds
  button.setCountMode(COUNT_FALLING);
}

void loop() {
  button.loop(); // MUST call the loop() function first

  unsigned long count = button.getCount();
  if (lastCount != count) {
    Serial.println(count); // print count to Serial Monitor
    oled.clearDisplay(); // clear display
    oled.println(count); // display count
    oled.display();      // show on OLED
    lastCount != count;
  }
}
Working Explanation
The OLED module is connected to the microcontroller using the I2C communication protocol, which uses a clock (SCL) and data (SDA) line. The OLED module is controlled by sending commands and data over the I2C bus using libraries specific to the OLED and the microcontroller. The pushbutton is connected to the microcontroller, typically to a digital input pin. The state of the pushbutton (pressed or released) is read using the Arduino’s digital input functions.
In the setup() function, the serial communication is initialized at a baud rate of 9600 and the OLED is initialized by calling the begin() and clearDisplay() functions. Also, the pushbutton pin is configured as an input with a pull-up resistor.
In the loop() function, the state of the pushbutton is read using the digitalRead() function and stored in the buttonState variable. Then, depending on the state of the button, the OLED is controlled to display a message or not. In the same loop, the status of the button is sent to the serial monitor.
Applications
- User interfaces for home automation and industrial controls
- Status displays for monitoring sensor data
- Gaming devices
- Debugging tools for displaying variables and other information
- Educational projects and devices
- Smart devices
- Wearable technology
- Embedded systems
Conclusion.
We hope you have found this OLED Button Count Circuit very useful. If you feel any difficulty in making it feel free to ask anything in the comment section.