Introduction
Moisture is a significant challenge for agriculturalists and farmers. High moisture levels can be detrimental to the soil. Consequently, the yield gets reduced, and seed waste does have an adverse effect. Plants and crops are often in danger. The irrigation system is also get affected. To address this problem, soil moisture sensors that aid in reading soil data were created.
Without a doubt, the moisture may be examined manually. Manual methods, however, are ineffective. To resolve this concern, soil moisture sensor plays their role. So in this article, we will interface a Soil Moisture sensor with an Arduino and display data on a 16×2 LCD
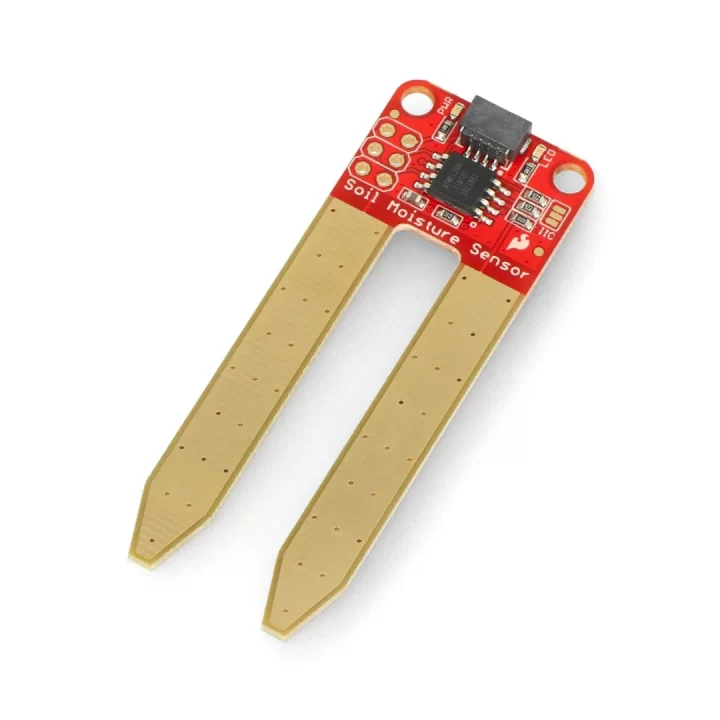
What is Soil Moisture Sensor?
Sensors that assess the volumetric water content are commonly referred to as soil moisture sensors. The soil moisture sensor is capable of long-term, ongoing soil moisture monitoring. Users can adapt how they place soil moisture sensors to meet their monitoring requirements.
Hardware Components
You will require the following hardware for the Soil Moisture Sensor.
| S.no | Component | Value | Qty |
|---|---|---|---|
| 1. | Arduino | UNO | 1 |
| 2. | Soil Moisture Sensor | – | 1 |
| 3. | LED | 16×2 | 1 |
| 4. | Breadboard | – | 1 |
| 5. | Jumper Wires | – | 1 |
Steps Making Soil Moisture Sensor
To use Soil Moisture Sensor With LCD Display, you also required an Arduino, a breadboard, and some wires. Once you have them all; follow the following steps:
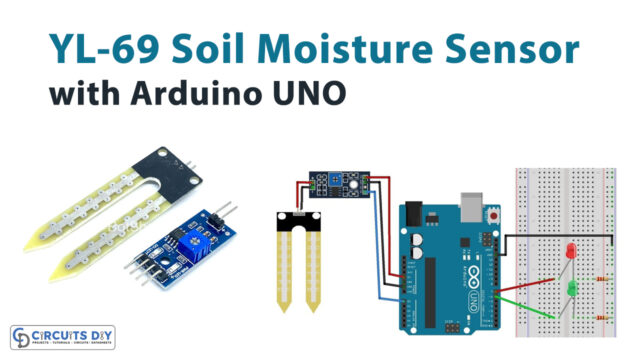
Schematic
Make connections according to the circuit diagram given below.
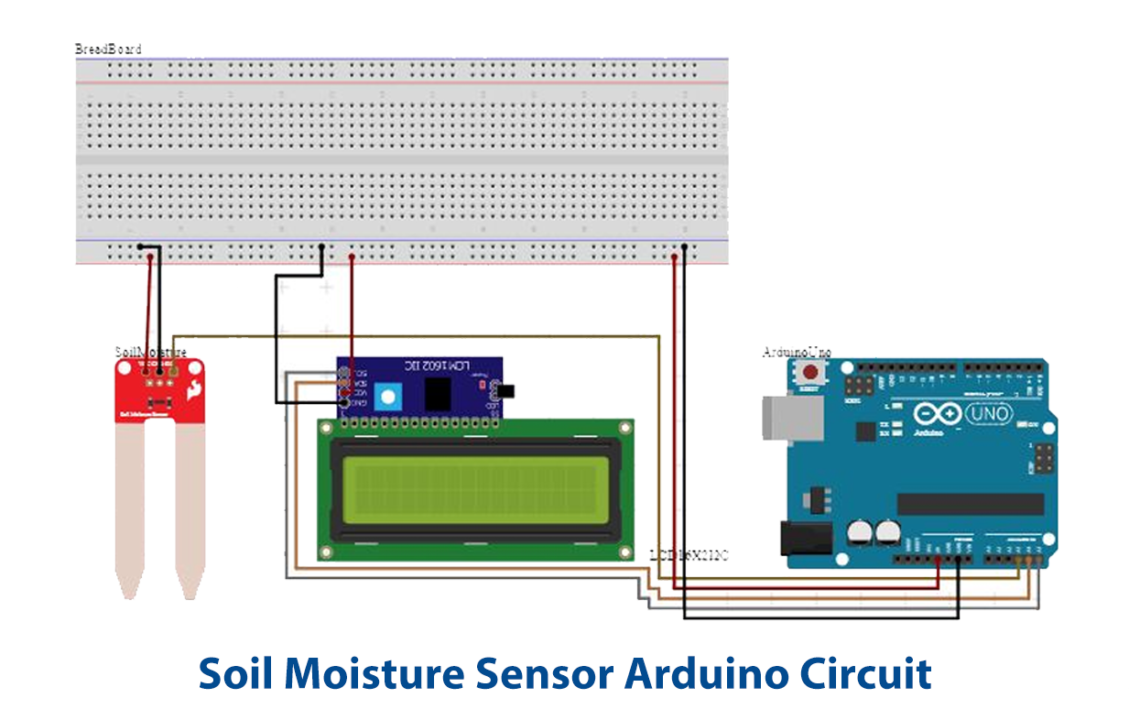
Wiring / Connections
| Arduino | Soil Moisture Sensor | LCD – 16×2 |
|---|---|---|
| 5V | VCC | VCC |
| GND | GND | GND |
| A3 | A0 | – |
| A5 | – | SCL |
| A4 | – | SDA |
Installing Arduino IDE
First, you need to install Arduino IDE Software from its official website Arduino. Here is a simple step-by-step guide on “How to install Arduino IDE“.
Installing Libraries
Before you start uploading a code, download and unzip the following libraries at /Progam Files(x86)/Arduino/Libraries (default), in order to use the sensor with the Arduino board. Here is a simple step-by-step guide on “How to Add Libraries in Arduino IDE“.
Code
Now copy the following code and upload it to Arduino IDE Software.
#include <LiquidCrystal.h>
// initialize the library with the numbers of the interface pins
LiquidCrystal lcd(5, 4);
// These constants won't change. They're used to give names
// to the pins used:
const int analogInPin = A5; // Analog input pin that the Sensor is attached to
int sensorValue = 0; // value read from the Soil Moisture
void setup() {
// set up the LCD's number of columns and rows:

lcd.begin(16, 2);
delay(100);
}
void loop() {
lcd.clear();
lcd.print("Soil Moisture:");// print the results to the LCD Display:
sensorValue = analogRead(analogInPin);// read the analog in value:
lcd.setCursor(0, 1);
lcd.print(sensorValue);
// wait 300 milliseconds before the next loop for the
//analog-to-digital converter to settle after the last reading:
delay(300);
}
Let’s Test It
It is now time to test and run the circuit. Turn on the Arduino. After inserting the soil moisture sensor into the soil, the readings will appear on the LCD screen.
Working Explanation
Let’s dig into the coding to understand the working:
- First, we include the LCD library to communicate with LCD.
- We specified the Arduino pins that are connected to the sensor. We also define the variable sensorValue to store the coming sensor value. Initially, we keep the value 0 in it.
- Then, using the lcd.begin function, initialize the LCD in the void setup.
- In the void loop, we first clear the LCD by lcd.clear() function. Then we print the phrase Soil Moisture by using lcd.print. Then to read the analog value from the sensor, we give the analogRead function and store it in variable SensorValue. Now to print that SensorValue on the LCD, we again use the function lcd.print()
Applications
- Agricultural irrigation
- Greenhouses
- Soil rapid testing
- Plant cultivation
- Scientific experiments; etc
Conclusion.
We hope you have found this Soil Moisture Sensor Circuit very useful. If you feel any difficulty in making it feel free to ask anything in the comment section.