
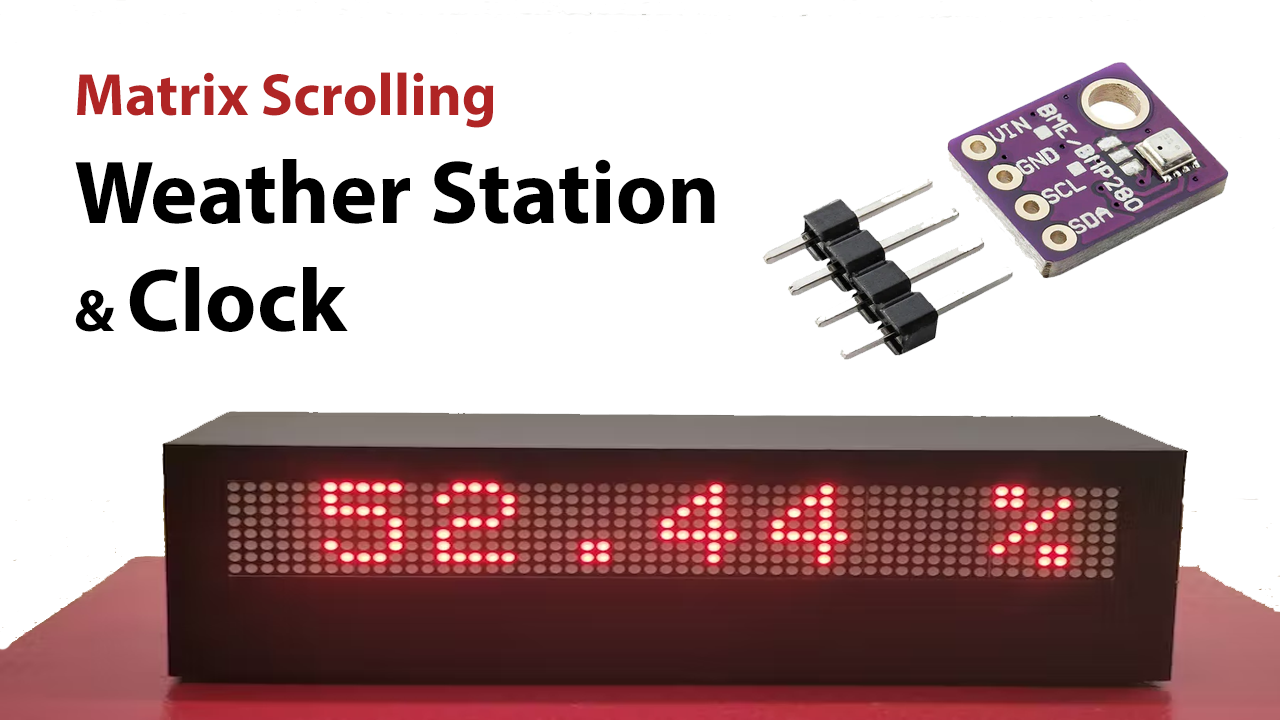
Introduction
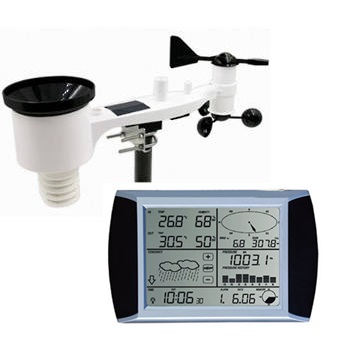
Have there ever been times in your life when you feel as though you’re doing everything right but the weather simply isn’t by your side? Despite the fact that it appears to be a clear day, you never know if it may start to rain in an hour, which could ruin your plans. Since the weather has an impact on daily living. Therefore, nothing does the job quite like a personal weather station when it comes to monitoring weather forecasts. This article is not just about learning about weather stations, but also about making them. Hence we will make Matrix Scrolling Weather Station & Clock.
People who enjoy outdoor activities can mark the calendar in accordance with the information from a weather station. To assist you in making future forecast predictions, the device can calculate temperature, pressure, and humidity. This enables you to adjust your plans in consideration of the weather.
What is Weather Station?
A weather station is a set of sensors that detect atmospheric parameters such as pressure, temperature, and humidity to help in the study of a given location’s weather and environment. A weather station is a compact and durable device used to collect data on the weather forecast. The acquired data is then processed by software that analyses the information and uploads it to the phone, computers, etc.
Hardware Components
You will require the following hardware for Matrix Scrolling Weather Station & Clock.
| S.no | Component | Value | Qty |
|---|---|---|---|
| 1. | Arduino | UNO | 1 |
| 2. | Sensor | BME280 | 1 |
| 3. | Led dot matrix display | MAX7219 | 7 |
| 4. | Real Time Clock Module | DS3231 | 1 |
| 5. | LED | – | 1 |
| 6. | Resistor | Ω | 1 |
| 7. | Breadboard | – | 1 |
| 8. | Jumper Wires | – | 1 |
Steps Making Matrix Scrolling Weather Station & Clock
Matrix Scrolling Weather Station requires the components given above. Once you have those components, you then need to follow the steps further:
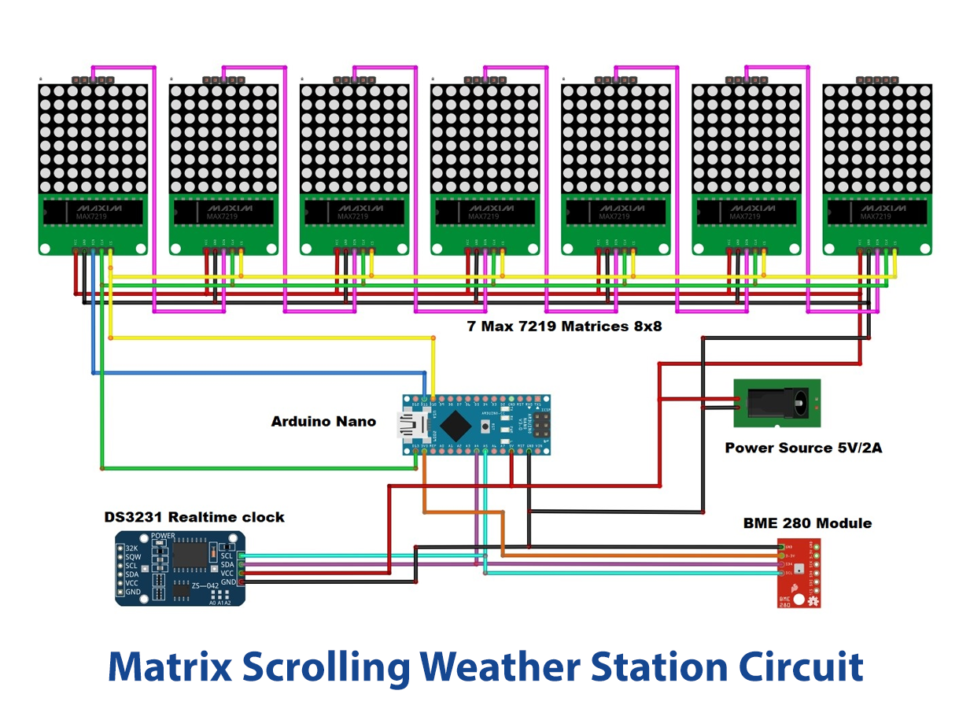
Schematic
Make connections according to the circuit diagram given below.
Installing Arduino IDE
First, you need to install Arduino IDE Software from its official website Arduino. Here is a simple step-by-step guide on “How to install Arduino IDE“.
Installing Libraries
Before you start uploading a code, download and unzip the following libraries at /Progam Files(x86)/Arduino/Libraries (default), in order to use the sensors with the Arduino board. Here is a simple step-by-step guide on “How to Add Libraries in Arduino IDE“.
Code
Now copy the following code and upload it to Arduino IDE Software.
#include <SPI.h>
#include <Adafruit_GFX.h>
#include <Max72xxPanel.h>
#include <Adafruit_BME280.h>
#include "RTClib.h"

RTC_DS1307 rtc;

char daysOfTheWeek[7][12] = {"Sunday", "Monday", "Tuesday", "Wednesday", "Thursday", "Friday", "Saturday"};

Adafruit_BME280 bme280;
int mm;

int pinCS = 10; // Uno or Duemilanove DIN 11 (MOSI) CLK 13 (SCK)
int numberOfHorizontalDisplays = 7;
int numberOfVerticalDisplays = 1;

Max72xxPanel matrix = Max72xxPanel(pinCS, numberOfHorizontalDisplays, numberOfVerticalDisplays);

String tape = "";
int wait = 25; // speed

int spacer = 2; // Character spacing (points)
int width = 5 + spacer; // Font width 5 pixels

String utf8rus(String source)
{
  int i,k;
  String target;
  unsigned char n;
  char m[2] = { '0', '\0' };

  k = source.length(); i = 0;
  while (i < k) {
    n = source[i]; i++;
    if (n >= 0xC0) {
      switch (n) {
        case 0xD0: {
          n = source[i]; i++;
          if (n == 0x81) { n = 0xA8; break; }
          if (n >= 0x90 && n <= 0xBF) n = n + 0x2F;
          break;
        }
        case 0xD1: {
          n = source[i]; i++;
          if (n == 0x91) { n = 0xB7; break; }
          if (n >= 0x80 && n <= 0x8F) n = n + 0x6F;
          break;
        }
      }
    }
    m[0] = n; target = target + String(m);
  }
return target;
}

String Serial_Read() {
  unsigned char c; // variable port for reading series
  String Serial_string = ""; // Forming from a character string
  while (Serial.available() > 0) { // If there are symbols in the series
    c = Serial.read(); // We read a symbol
    //Serial.print(c,HEX); Serial.print(" "); Serial.print(c);
    if (c == '\n') {  //If this is a string of lines
          return Serial_string; // We return the line
    }
    if (c == 0xB8) c = c - 0x01;
    if (c >= 0xBF && c <= 0xFF) c = c - 0x01;
    Serial_string = Serial_string + String(char(c)); //Add symbol to line
  }
  return Serial_string;
}
String chas;
String myn;
//String mesyc = "";

void setup() {

  Serial.begin(9600);
  Serial.println(F("bme280"));
  //==================================== hours
  if (! rtc.begin()) {
    Serial.println("Couldn't find RTC");
    Serial.flush();
    abort();
  }
  if (! rtc.isrunning()) {
    Serial.println("RTC is NOT running, let's set the time!");
    // When time needs to be set on a new device, or after a power loss, the
    // following line sets the RTC to the date & time this sketch was compiled
    rtc.adjust(DateTime(F(__DATE__), F(__TIME__)));
    // This line sets the RTC with an explicit date & time, for example to set
    // January 21, 2014 at 3am you would call:
    // rtc.adjust(DateTime(2014, 1, 21, 3, 0, 0));
  }
 //====================================
  while (!bme280.begin(BME280_ADDRESS - 1)) {
    Serial.println(F("Could not find a valid bme280 sensor, check wiring!"));
    delay(2000);
  }


  matrix.setIntensity(3); // Use a value between 0 and 15 for brightness
  matrix.setRotation(matrix.getRotation()+0); //1 - 90  2 - 180   3 - 270
 //a=a+1;
}
void loop() {
  DateTime now = rtc.now();
  float temperature = bme280.readTemperature();
  float pressure = bme280.readPressure()/100.0F;
  float altitude = bme280.readAltitude(1013.2);
  float humidity = bme280.readHumidity();
  pressure = pressure + 78.5  ;   //Relative pressure for 700m above sea level, comment this row for relative atmospheric pressure
 //======================================= correction digit time zero before the number
 chas ="";
 myn = "";
 if (now.hour() < 10) {
chas = '0';
}

if (now.minute() < 10) {
myn = ('0');
}

//=======================================
 tape = utf8rus((String)+daysOfTheWeek[now.dayOfTheWeek()]+"     Time  "+chas +now.hour()+":"+myn+now.minute()+" h    Temperature = "+temperature +" degree C   Humidity = " + humidity +  " %    Pressure = "+ pressure +" Hpa");
  if (Serial.available()){
    tape=Serial_Read();
  }
  for ( int i = 0 ; i < width * tape.length() + matrix.width() - 1 - spacer; i++ )
       {
    matrix.fillScreen(LOW);

    int letter = i / width; // number of symbols displayed on a matrix

    int y = (matrix.width() - 1) - i % width;
    int x = (matrix.height() - 8) / 2;

    while ( y + width - spacer >= 0 && letter >= 0 ) {
      if ( letter < tape.length() ) {
        matrix.drawChar(y, x, tape[letter], HIGH, LOW,1);
      }
      letter--;
      y -= width;
    }
    matrix.write(); // Send a picture for display
    delay(wait);
  }
}
Let’s Test It
It’s time to put the circuit to the test. And to do this, you must turn on the Arduino. As soon as you turn it on, the following scrolling text shows in order:
- Day of the week
- Current time
- The temperature in degrees Celsius
- Air humidity
- Relative Atmospheric Pressure in hectopascals
Working Explanation
- First, we have included the required libraries in the code. To hold days information, we construct an RTClib library object rtc and declare the daysOfTheWeek 2D character array. Create the Adafruit_BME280 object called bme to access some functions. Then we name the pins of Arduino that have been utilized.We create an object to control a canvas of 8×8 LED sets driven by a MAX7219 or controller.
- In the void setup, initialize the serial monitor using serial. begin( ).
- We then Create a loop in which if the sensor is not located, the serial monitor prints a message ‘Couldn’t find RTC’ indicating that it was unable to locate a sensor. And rtc if the sensor is found, adjust() function is available to set the date and time. We then make the while condition if bme sensor isn’t available, it would print the message “Could not find a valid bme280 sensor, check wiring”.
- matrix.setIntensity is used to control the brightness of LEDs. The location of each matrix’s contents can be rotated in code with the command matrix.setRotation.
- In the void loop, the function rtc.now() returns the current date and time.
- bme280.readTepmerature( ), bme280.readPressure( ), bme280.readAltitude( ), bme280.readHumidity( ) functions to read the temperature, pressure, altitude, and humidity respectively.
- You may make the entire screen one color by using the matrix.fillScreen function. To set the width and height of matrix two functions matrix.width() matrix.height() are used.
- Using the matrix.write(), a display image can be sent.
Applications
- Agriculture and irrigation system
- Home, office, industrial automation devices; etc
Conclusion.
We hope you have found this matrix scrolling weather station & clock circuit very interesting. If you feel any difficulty in making it feel free to ask anything in the comment section.
Related posts:
 Interfacing A3967 Stepper Motor Driver with Arduino
 DIY 12 Volt Soldering Iron - Homemade
 Interfacing TM1637 4-Digit 7-Segment Display with Arduino UNO
 Controlling DC, Stepper & Servo with L293D Motor Driver
 4 Siren Sound Generator using UM3561 - Police Ambulance Sound
 TV Remote Control Jammer Circuit - Electronics Projects


