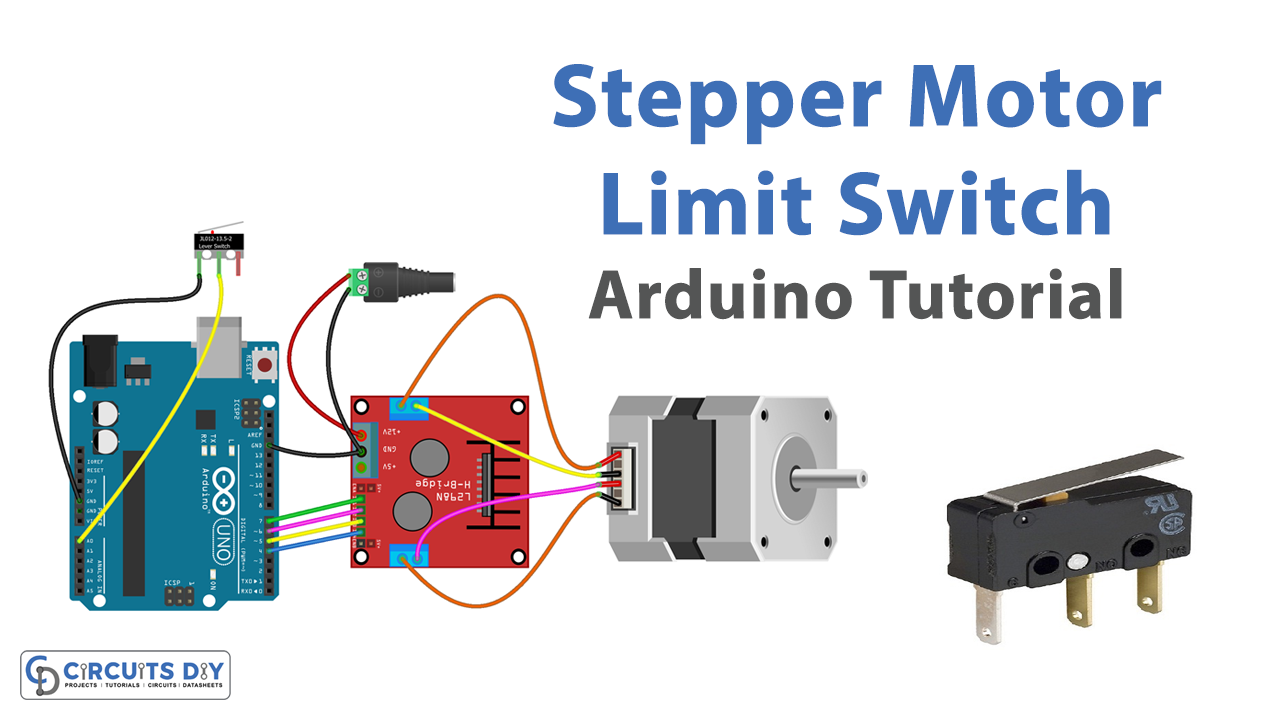
Introduction
Controlling a stepper motor with precision and accuracy is crucial in many industries and applications, from robotics and CNC machines to 3D printing and automated stages. The Nema 17 Bipolar Stepper Motor, combined with the L298N Motor Driver Controller module and a Limit Switch, provides a powerful and versatile solution for controlling the movement and position of a stepper motor.
The Nema 17 Bipolar Stepper Motor is a type of stepper motor that is widely used in various applications, it has high torque, high accuracy, and low noise. The Limit Switch is an electromechanical device that is used to detect the presence or absence of an object, in this solution it is used to detect the end position of the stepper motor and stop the motor when it reaches the desired position.
Hardware Components
You will require the following hardware for Stepper Motor and Limit Switch with Arduino.
| S.no | Component | Value | Qty |
|---|---|---|---|
| 1. | Arduino UNO | – | 1 |
| 2. | USB Cable Type A to B | – | 1 |
| 3. | Limit Switch | – | 1 |
| 4. | Stepper Motor Nema 17 | – | 1 |
| 5. | Motor Driver Module | L298N | 1 |
| 6. | Power Adapter | 12V | 1 |
| 7. | DC Power Jack | – | 1 |
| 8. | Power Adapter for Arduino | 9V | 1 |
| 9. | Jumper Wires | – | 1 |
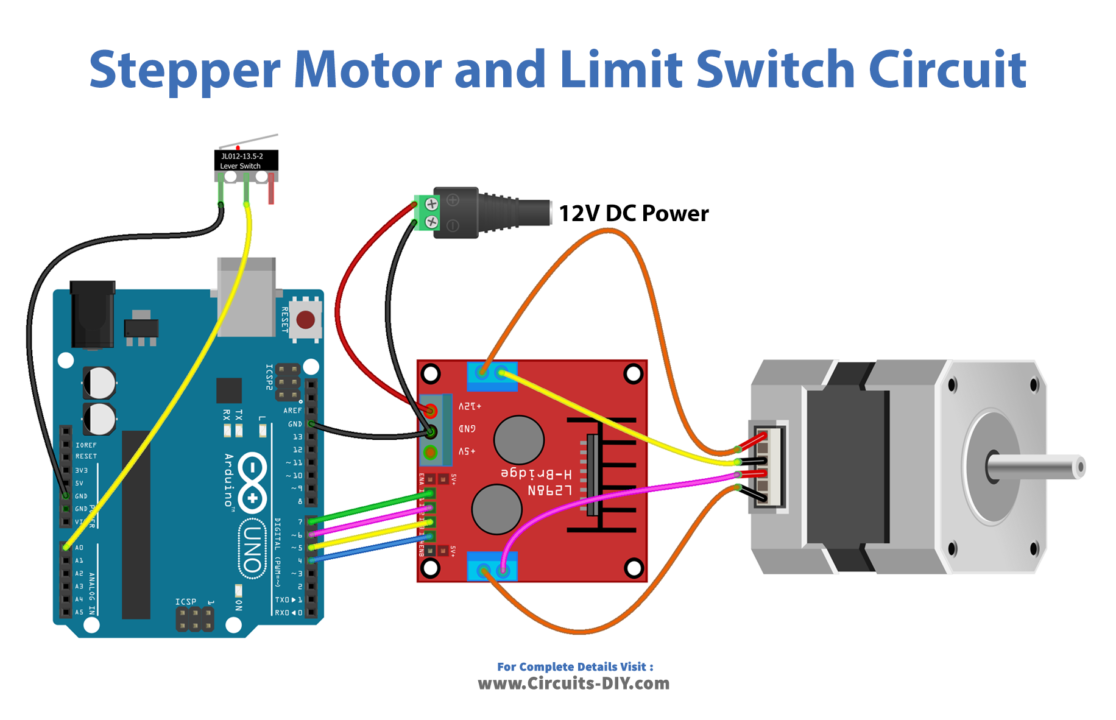
Stepper Motor and Limit Switch with Arduino
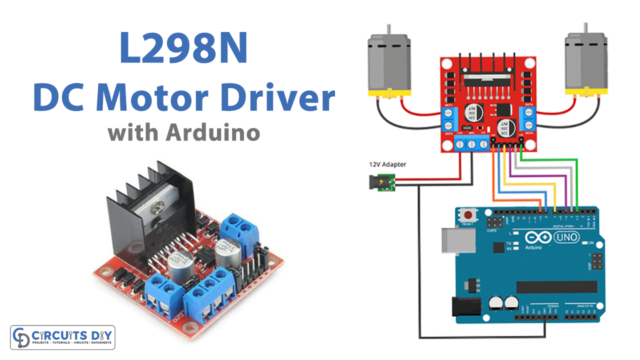
- Connect the Nema 17 Bipolar Stepper Motor to the L298N Motor Driver Controller module. Connect the 4 wires of the stepper motor to the IN1, IN2, IN3, and IN4 pins of the driver board.
- Connect the Limit Switch to the Arduino UNO. Connect one pin of the limit switch to the GND pin and the other pin to a digital pin (e.g. 2) of the Arduino.
- In the Arduino IDE, import the necessary libraries by adding these lines at the top of your sketch:
#include <Stepper.h>
- In the setup() function, create a new Stepper object and set the number of steps per revolution of the stepper motor:
Stepper myStepper(200, 8, 10, 9, 11);
- In the loop() function, set fixed maximum speed, acceleration, initial speed and position of the stepper motor using the setMaxSpeed() , setAcceleration() , setSpeed() and move() functions respectively:
myStepper.setMaxSpeed(60);
myStepper.setAcceleration(100);
myStepper.setSpeed(30);
myStepper.move(200);
- Use the digitalRead() function to check the status of the limit switch and once the limit switch is triggered, stop the stepper motor:
int switchState = digitalRead(2);
if(switchState == HIGH){
  myStepper.setSpeed(0);
}
- Use the Serial.println() function to send the status of the stepper motor to the serial monitor:
Serial.println("Stepper motor is running at: " + String(myStepper.speed()) + " RPM");
- Upload the code to the Arduino UNO microcontroller and open the serial monitor to see the status of the stepper motor.
Schematic
Make connections according to the circuit diagram given below.
Installing Arduino IDE
First, you need to install Arduino IDE Software from its official website Arduino. Here is a simple step-by-step guide on “How to install Arduino IDE“.
Installing Libraries
Before you start uploading a code, download and unzip the following libraries at /Progam Files(x86)/Arduino/Libraries (default), in order to use the sensor with the Arduino board. Here is a simple step-by-step guide on “How to Add Libraries in Arduino IDE“.
Code
Now copy the following code and upload it to Arduino IDE Software.
Arduino Code – Stop Stepper Motor by a Limit Switch
#include <ezButton.h>
#include <AccelStepper.h>

#define MAX_POSITION 0x7FFFFFFF // maximum of position we can set (long type)

ezButton limitSwitch(A0); // create ezButton object that attach to pin A0;

AccelStepper stepper(AccelStepper::FULL4WIRE, 7, 6, 5, 4);

bool isStopped = false;

void setup() {
  Serial.begin(9600);

  limitSwitch.setDebounceTime(50); // set debounce time to 50 milliseconds

  stepper.setMaxSpeed(500.0);   // set the maximum speed
  stepper.setAcceleration(50.0); // set acceleration
  stepper.setSpeed(100);         // set initial speed
  stepper.setCurrentPosition(0); // set position

  stepper.moveTo(MAX_POSITION);
}

void loop() {
  limitSwitch.loop(); // MUST call the loop() function first

  if (limitSwitch.isPressed()) {
    Serial.println(F("The limit switch: TOUCHED"));
    isStopped = true;
  }

  if (isStopped == false) {
    // without this part, the move will stop after reaching maximum position
    if (stepper.distanceToGo() == 0) { // if motor moved to the maximum position
      stepper.setCurrentPosition(0);   // reset position to 0
      stepper.moveTo(MAX_POSITION);       // move the motor to maximum position again
    }

    stepper.run(); // MUST be called in loop() function
  } else {
    // without calling stepper.run() function, motor stops immediately
    // NOTE: stepper.stop() function does NOT stops motor immediately
    Serial.println(F("The stepper motor is STOPPED"));
  }
}
Arduino Code – Change the Direction of the Stepper Motor by a Limit Switch
#include <ezButton.h>
#include <AccelStepper.h>

#define DIRECTION_CCW -1
#define DIRECTION_CW   1

#define MAX_POSITION 0x7FFFFFFF // maximum of position we can set (long type)

ezButton limitSwitch(A0); // create ezButton object that attach to pin A0;

AccelStepper stepper(AccelStepper::FULL4WIRE, 7, 6, 5, 4);

int direction  = DIRECTION_CW;
long targetPos = 0;

void setup() {
  Serial.begin(9600);

  limitSwitch.setDebounceTime(50); // set debounce time to 50 milliseconds

  stepper.setMaxSpeed(500.0);   // set the maximum speed
  stepper.setAcceleration(50.0); // set acceleration
  stepper.setSpeed(100);         // set initial speed
  stepper.setCurrentPosition(0); // set position

  targetPos = direction * MAX_POSITION;
  stepper.moveTo(targetPos);
}

void loop() {
  limitSwitch.loop(); // MUST call the loop() function first

  if (limitSwitch.isPressed()) {
    Serial.println(F("The limit switch: TOUCHED"));
    direction *= -1; // change direction
    Serial.print(F("The direction -> "));
    if (direction == DIRECTION_CW)
      Serial.println(F("CLOCKWISE"));
    else
      Serial.println(F("ANTI-CLOCKWISE"));

    targetPos = direction * MAX_POSITION;
    stepper.setCurrentPosition(0); // set position
    stepper.moveTo(targetPos);
  }

  // without this part, the move will stop after reaching maximum position
  if (stepper.distanceToGo() == 0) { // if motor moved to the maximum position
    stepper.setCurrentPosition(0);   // reset position to 0
    stepper.moveTo(targetPos);       // move the motor to maximum position again
  }

  stepper.run(); // MUST be called in loop() function
}
Working Explanation
First, the necessary libraries are imported into the Arduino IDE, such as the Stepper library which provides the setMaxSpeed(), setAcceleration(), setSpeed(), move(), and step() functions to control the stepper motor. Then, in the setup() function, a new Stepper object is created and the number of steps per revolution of the stepper motor is set.
In the loop() function, the setMaxSpeed(), setAcceleration(), setSpeed() and move() functions are used to set fixed maximum speed, acceleration, initial speed, and position of the stepper motor. The code also uses the digitalRead() function to check the status of the limit switch and once the limit switch is triggered, the stepper motor stops. Finally, the Serial.println() function is used to send the status of the stepper motor to the serial monitor, so that the user can see the current status of the motor.
Applications
- CNC machines
- Automated stages
- Automated testing equipment
- Medical equipment
- Industrial automation
Conclusion.
We hope you have found this Stepper Motor and Limit Switch Circuit very useful. If you feel any difficulty in making it feel free to ask anything in the comment section.