Introduction
Light detection and ranging sensors, sometimes known as “LiDAR” for short, are a relatively new technology rapidly becoming the industry standard for autonomous cars. So, in this tutorial, we will make “VL53L0X LIDAR Distance Sensor Interfacing with Arduino.”
After completing this tutorial, you can build a circuit that can accurately measure distances in millimeters. Okay, then, let’s not waste any more time and get started!
What is the LIDAR Distance Sensor
LiDAR sensors are a form of laser distance sensor that measures the distance, or depth, from a surface. They function by sending pulses in every direction and measuring the time it takes for those pulses to return after bouncing off of objects.
The function of LiDAR sensors is based on a concept similar to that of ultrasonic sensors. The only significant difference between them is the frequency at which they work. LiDARs use laser beams to measure distance and analyze objects instead of sound waves because they measure distance.
Hardware Required
| S.no | Components | Value | Qty |
|---|---|---|---|
| 1 | Arduino | UNO | 1 |
| 2 | USB Cable | Type A to B | 1 |
| 3 | Laser Distance module | VL53L0X | 1 |
| 4 | Jumper Wires | – |
Steps Interfacing LIDAR Distance Sensor with Arduino
To begin building this touch distance measurement circuit, you will first need to ensure that you have all the components stated in the hardware section. Once you have all of them, proceed with the steps that are listed below:
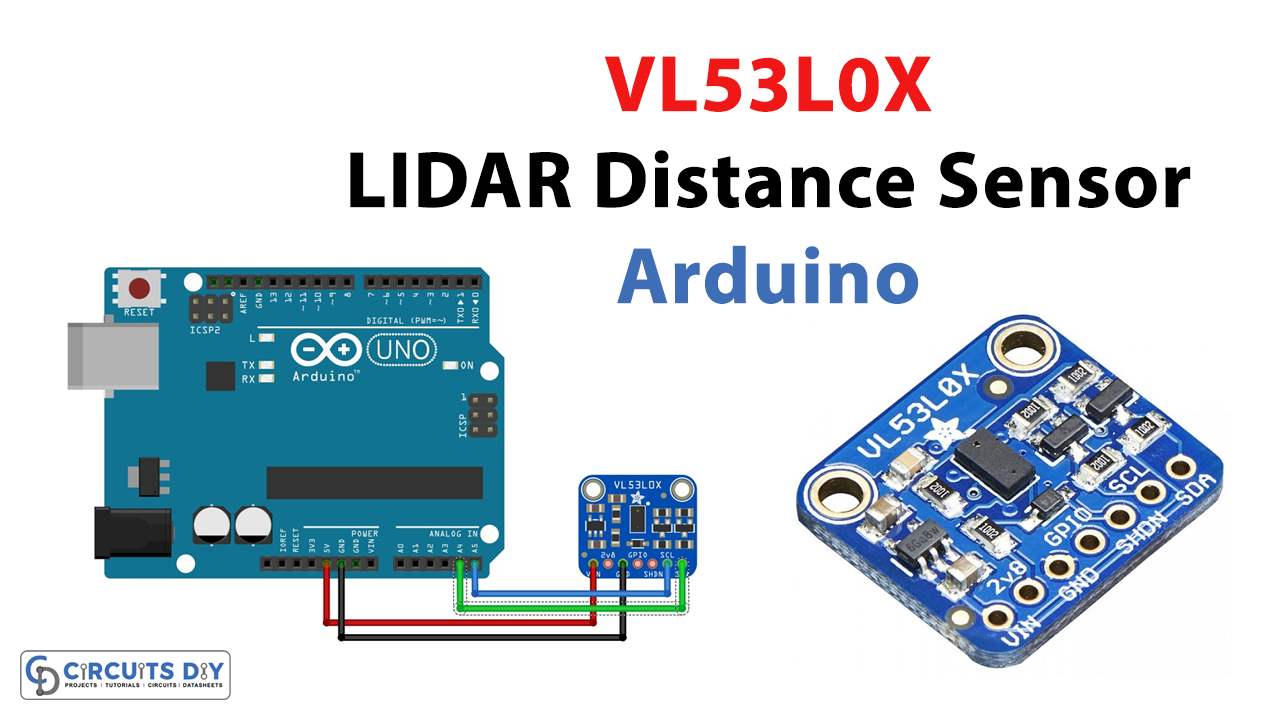
Circuit Diagram

Connection Table
| Arduino Uno | VL53L0X Module |
|---|---|
| 5V | Vin |
| GND | GND |
| A4 | SDA |
| A5 | SCL |
Arduino Code
#include "Adafruit_VL53L0X.h"

Adafruit_VL53L0X lox = Adafruit_VL53L0X();

void setup() {
  Serial.begin(115200);

  // wait until serial port opens for native USB devices
  while (! Serial) {
    delay(1);
  }

  Serial.println("Adafruit VL53L0X test");
  if (!lox.begin()) {
    Serial.println(F("Failed to boot VL53L0X"));
    while(1);
  }
  // power
  Serial.println(F("VL53L0X API Simple Ranging example\n\n"));
}


void loop() {
  VL53L0X_RangingMeasurementData_t measure;

  Serial.print("Reading a measurement... ");
  lox.rangingTest(&measure, false); // pass in 'true' to get debug data printout!

  if (measure.RangeStatus != 4) {  // phase failures have incorrect data
    Serial.print("Distance (mm): "); Serial.println(measure.RangeMilliMeter);
  } else {
    Serial.println(" out of range ");
  }

  delay(100);
}
Time to Test!
Now that the circuit has been wired and the code given has been uploaded, it is time to test it. The circuit will begin to function as soon as the power is supplied to the Arduino. When you position any object in front of the sensor, it will calculate the distance between the sensor and the object and display the results on the serial monitor.
Working Explanation
Since the functioning of the circuit relies on the code, comprehension of this would be necessary. Let’s talk quickly about how code actually functions.
- In the code, we first include the library for the sensor. VL53L0X LIDAR Distance Sensor. Know that your code won’t work without including the library.
- In the void setup, we first initialize the serial monitor. After that, the code waits until the serial port is available for USB devices. Once it boots the sensor, you will see that the serial monitor will print the Adafruit VL53L0X test. Otherwise, the serial monitor prints ailed to boot VL53L0X. Following that, you will see the serial monitor printing “VL53L0X API Simple Ranging example
- In the void loop, the code is given to measure distance in mm and print that reading on the serial monitor. But if the reading from the sensor does not equal the prescribed range, the serial monitor will print out of range.
- The code then has some delay in getting the new reading.
Application and Uses
- Gesture identifiers.
- Sensing of nearby objects.
- Robotics.
- Anti-collision devices.
- Drones, etc