Introduction
Sensors for temperature and humidity may be found in practically any place. These sensors can detect water vapor in the air as well as the temperature of the surrounding environment. But how do they operate, and how can we employ them for our good? Continue reading this post to learn everything there is to know. Because this article is about interfacing the DHT11 Temperature/Humidity Sensor with Arduino
These sensors are created to monitor both the temperature and humidity of the surroundings for a variety of applications. The demand for these sensors arises from the fact that the humidity should be detected and managed in many sectors due to the significant impact it may have on various processes.
What is Temperature/Humidity Sensor?
A temperature and humidity sensor is an electronic device that can detect the temperature and humidity of the surrounding air and convert the results into an electrical signal that may be utilized for a wide range of purposes.
Hardware Components
You will require the following hardware to interface the DHT11 Temperature Sensor with Arduino.
| S.no | Component | Value | Qty |
|---|---|---|---|
| 1. | Arduino | UNO | 1 |
| 2. | Temperature Sensor | DHT11 | 1 |
| 3. | Resistor | 4.7KΩ | 1 |
| 4. | Breadboard | – | 1 |
| 5. | Jumper Wires | – | 1 |
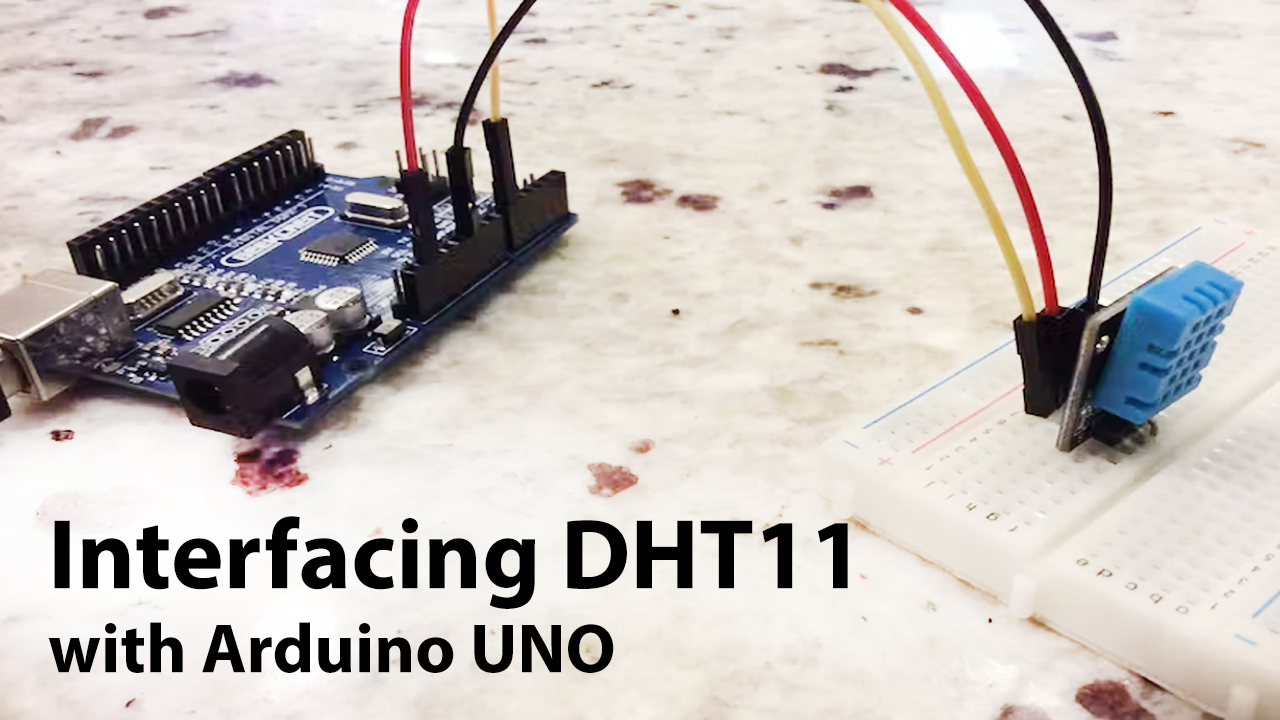
Steps Interfacing DHT11 Temperature/Humidity Sensor with Arduino
This DHT11 Temperature/Humidity Sensor with Arduino project requires only an Arduino, a DHT sensor, an LCD, and a resistor. Once you have them, proceed as follows:
Schematic
Make connections according to the circuit diagram given below.
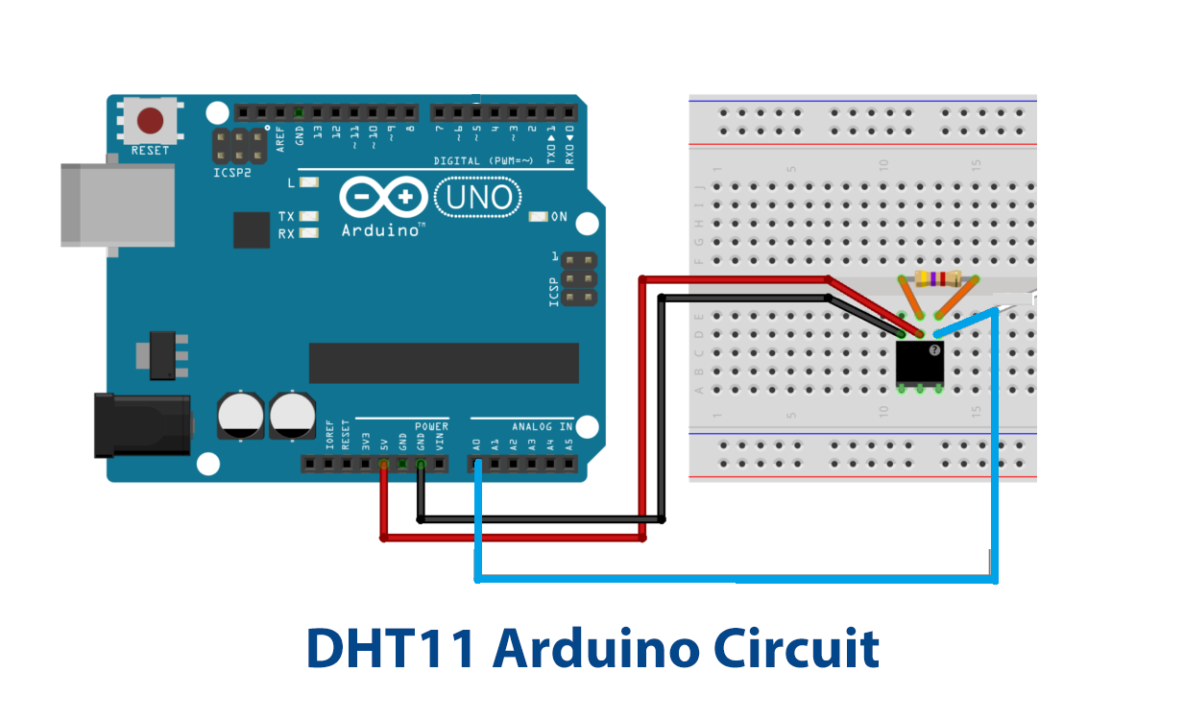
Wiring / Connections
| Arduino | DHT11 Temperature Sensor | Resistor |
|---|---|---|
| 5V | VCC | One Pin |
| GND | GND | |
| A0 | OUT | Other Pin |
Installing Arduino IDE
First, you need to install Arduino IDE Software from its official website Arduino. Here is a simple step-by-step guide on “How to install Arduino IDE“.
Installing Libraries
Before you start uploading a code, download and unzip the following libraries at /Progam Files(x86)/Arduino/Libraries (default), to use the sensor with the Arduino board. Here is a simple step-by-step guide on “How to Add Libraries in Arduino IDE“.
Code
Now copy the following code and upload it to Arduino IDE Software.
#include <dht.h>
#define dht_apin A0 // Analog Pin sensor is connected to
dht DHT;

void setup(){
  Serial.begin(9600);
  delay(500);//Delay to let system boot
  Serial.println("DHT11 Humidity & temperature Sensor\n\n");
  delay(1000);//Wait before accessing Sensor

}//end "setup()"

void loop(){
  //Start of Program

    DHT.read11(dht_apin);
    Serial.print("Current humidity = ");
    Serial.print(DHT.humidity);
    Serial.print("%  ");
    Serial.print("temperature = ");
    Serial.print(DHT.temperature);
    Serial.println("C  ");
    delay(5000);//Wait 5 seconds before accessing sensor again.
  //Fastest should be once every two seconds.

}// end loop(
Let’s Test It
Now that we’ve built the connections and uploaded the code, it’s time to put them to the test. Power up your Arduino for this. The temperature and humidity values will be displayed on the Serial monitor.
Working Explanation
To understand how it works, you must first understand the code, so let’s go into it!
- We first must add the necessary library to interface with the DHT sensor. Following that, we declare the Arduino pin that is connected to the DHT sensor. After that, the DHT object is created.
- In the void setup, to initialize communication with the serial monitor we give the function Serial.begin. We then provide Serial.println function to print a message. We add a small delay before accessing Sensor.
- In the void loop, we provide DHT.read11(dht_apin) function to read the data coming from the sensor at the connected Arduino pin A0. We then give Serial.print functions to print the values on the serial monitor. In the last we give a delay for 5 seconds for the sensor to read the next value,
Applications
- Home Automation Systems.
- Agriculture and irrigation systems
- Weather stations
- Automatic climate control appliances.
- Environment monitoring devices.
Conclusion.
We hope you have found this DHT11 Interfacing Tutorial very useful. If you feel any difficulty in making it feel free to ask anything in the comment section.