Introduction
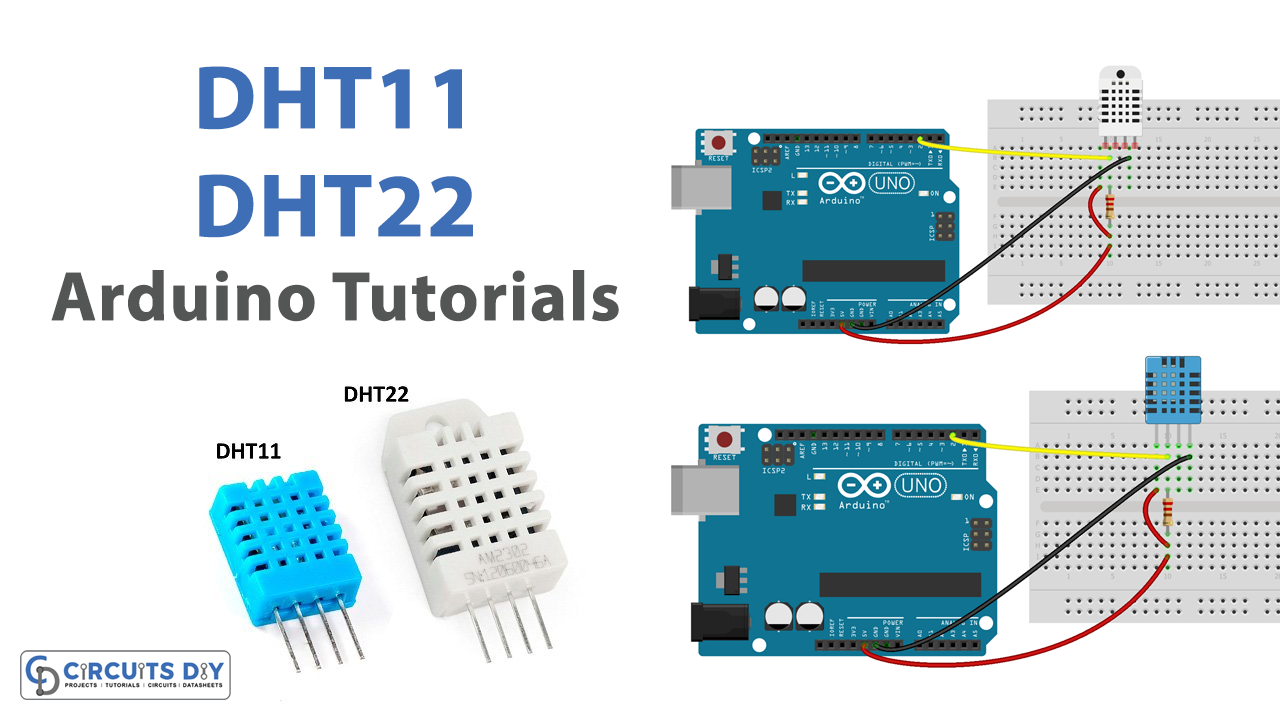
Interfacing a DHT11/DHT22 temperature/humidity sensor with an Arduino UNO microcontroller involves connecting the sensor to the microcontroller and using it to measure the ambient temperature and humidity. The DHT11/DHT22 sensor measures relative humidity, which is the amount of moisture in the air, and temperature. The data gathered by the sensor can be used in a variety of applications, such as home automation systems, weather stations, and HVAC systems, to monitor and control the environment. By connecting the sensor to the Arduino UNO, it can be read and processed by the microcontroller, allowing the data to be displayed on an LCD screen, transmitted wirelessly, or used to control other devices.
Hardware Components
You will require the following hardware for Interfacing DHT11/DHT22 Sensor with Arduino.
| S.no | Component | Value | Qty |
|---|---|---|---|
| 1. | Arduino UNO | – | 1 |
| 2. | USB Cable Type A to B | – | 1 |
| 3. | Temperature and Humidity Sensor | DHT11 | 1 |
| 4. | Temperature and Humidity Sensor | DHT22 | 1 |
| 5. | Power Adapter for Arduino | 9V | 1 |
| 6. | Resistor | 10kΩ | 1 |
| 7. | Breadboard | – | 1 |
| 8. | Jumper Wires | – | 1 |
Temperature Humidity Sensor with Arduino
- First, the necessary libraries are imported:
#include <DHT.h>
#include <DHT_11.h> //DHT11 or DHT22 library will be included
- Next, the pin number of the sensor is defined:
#define DHTPIN 13
- The type of DHT sensor (11 or 22) is also defined:
#define DHTTYPE DHT11
- A DHT object is then created using the defined pin number and type:
DHT dht(DHTPIN, DHTTYPE);
- In the
setup()function, the serial monitor is initialized and the DHT sensor is started:
void setup() {
  Serial.begin(9600);
  dht.begin();
}
- In the
loop()function, the temperature and humidity readings are taken and stored in variables:
float t = dht.readTemperature();
float h = dht.readHumidity();
- The temperature is then converted from Celsius to Fahrenheit and stored in a separate variable:
float f = t * 9 / 5 + 32;
- Finally, the temperature and humidity readings are printed to the serial monitor:
Serial.print("Temperature: ");
Serial.print(t);
Serial.print("°C  ");
Serial.print(" (~ ");
Serial.print(f);
Serial.print("°F)\t");
Serial.print("Humidity: ");
Serial.print(h);
Serial.println("%");
- A delay is added to slow down the output to the serial monitor:
delay(2000);Schematic
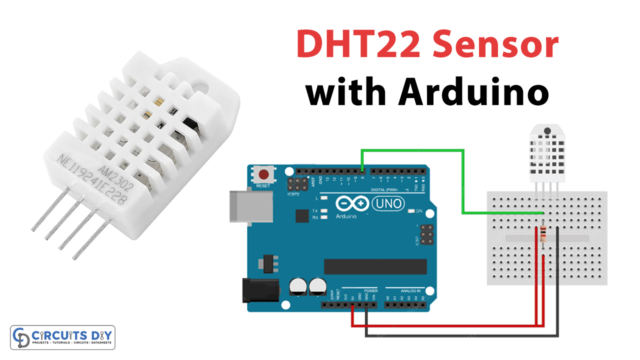
Make connections according to the circuit diagram given below.
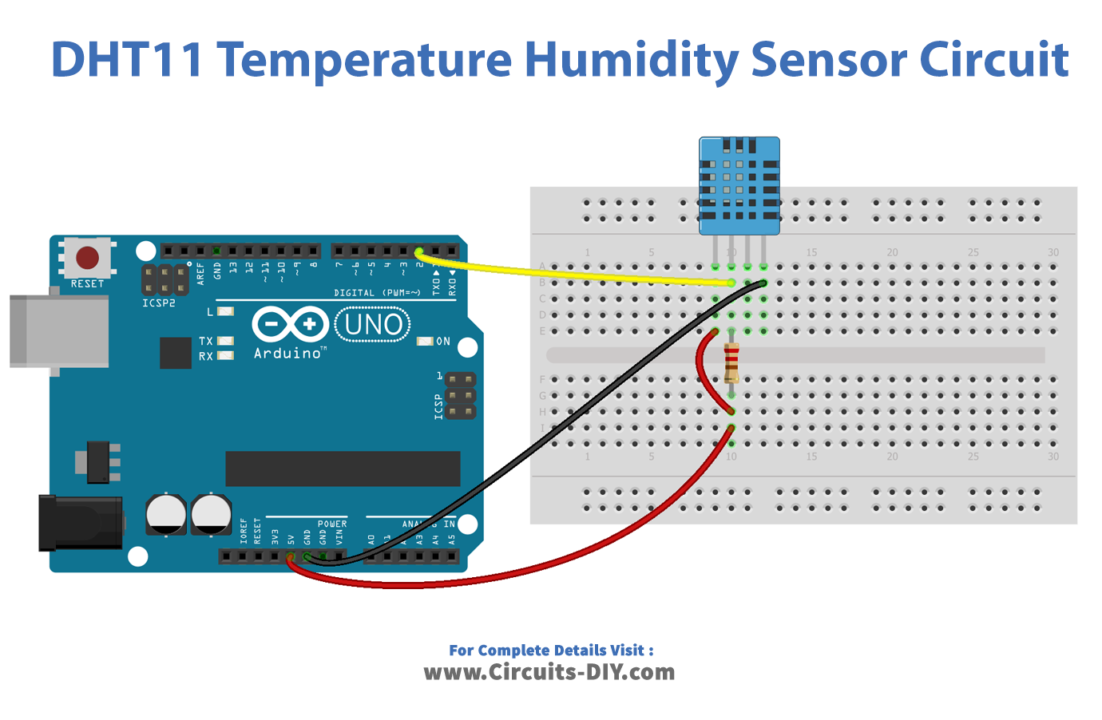

Wiring / Connections
| Arduino | DHT11 | DHT22 |
|---|---|---|
| 5V | VCC | VCC |
| GND | GND | GND |
| D2 | DATA | DATA |
Installing Arduino IDE
First, you need to install Arduino IDE Software from its official website Arduino. Here is a simple step-by-step guide on “How to install Arduino IDE“.
Installing Libraries
Before you start uploading a code, download and unzip the following libraries at /Progam Files(x86)/Arduino/Libraries (default), in order to use the sensor with the Arduino board. Here is a simple step-by-step guide on “How to Add Libraries in Arduino IDE“.
Code
Now copy the following code and upload it to Arduino IDE Software.
Arduino Code – DHT11
#include "DHT.h"
#define DHTPIN 2
#define DHTTYPE DHT11

DHT dht(DHTPIN, DHTTYPE);

void setup() {
  Serial.begin(9600);
  dht.begin(); // initialize the sensor
}

void loop() {
  // wait a few seconds between measurements.
  delay(2000);

  // read humidity
  float humi  = dht.readHumidity();
  // read temperature as Celsius
  float tempC = dht.readTemperature();
  // read temperature as Fahrenheit
  float tempF = dht.readTemperature(true);

  // check if any reads failed
  if (isnan(humi) || isnan(tempC) || isnan(tempF)) {
    Serial.println("Failed to read from DHT sensor!");
  } else {
    Serial.print("Humidity: ");
    Serial.print(humi);
    Serial.print("%");

    Serial.print("  |  ");

    Serial.print("Temperature: ");
    Serial.print(tempC);
    Serial.print("°C ~ ");
    Serial.print(tempF);
    Serial.println("°F");
  }
}
Arduino Code – DHT22
#include "DHT.h"
#define DHTPIN 2
#define DHTTYPE DHT22

DHT dht(DHTPIN, DHTTYPE);

void setup() {
  Serial.begin(9600);
  dht.begin(); // initialize the sensor
}

void loop() {
  // wait a few seconds between measurements.
  delay(2000);

  // read humidity
  float humi  = dht.readHumidity();
  // read temperature as Celsius
  float tempC = dht.readTemperature();
  // read temperature as Fahrenheit
  float tempF = dht.readTemperature(true);

  // check if any reads failed
  if (isnan(humi) || isnan(tempC) || isnan(tempF)) {
    Serial.println("Failed to read from DHT sensor!");
  } else {
    Serial.print("Humidity: ");
    Serial.print(humi);
    Serial.print("%");

    Serial.print("  |  ");

    Serial.print("Temperature: ");
    Serial.print(tempC);
    Serial.print("°C ~ ");
    Serial.print(tempF);
    Serial.println("°F");
  }
}
Working Explanation
In the setup function, the serial communication is initiated and the DHT sensor is initialized using the “dht.begin()” function. In the loop function, the code first waits for 2 seconds and then reads the humidity and temperature data from the sensor. The “dht.readHumidity()” function reads the humidity and the “dht.readTemperature()” function reads the temperature in Celsius. If the temperature needs to be read in Fahrenheit, the function call should include “true” as an argument.
The code then checks if any of the readings failed by using the “isnan()” function, which returns true if the value passed to it is not a number. If the readings failed, a message “Failed to read from DHT sensor!” is printed on the serial monitor. If the readings were successful, the humidity and temperature data are printed on the serial monitor, with “Humidity:” and “Temperature:” as the labels and with units of “%” and “°C/°F”, respectively.
Applications
- Climate control systems
- Indoor air quality monitoring
- Greenhouse and horticulture monitoring
- Weather stations
- Home automation systems
- Cold storage and warehouse temperature monitoring
- Agriculture and soil moisture monitoring
Conclusion.
We hope you have found these Temperature Humidity Sensor Circuits very useful. If you feel any difficulty in making it feel free to ask anything in the comment section.