Introduction
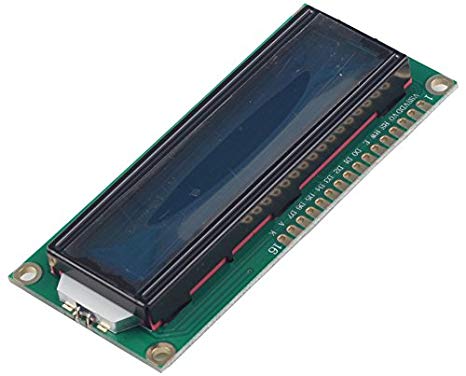
If you’re searching for a display that uses fewer pins to communicate with the microcontroller then this tutorial is for you. Because In this tutorial, we are going to interface ” I2C LCD with Arduino UNO”. I2C LCD only requires two pins for the interfacing. An LCD comprises the adapter and a display. Usually, the LCD is utilized to display the characters. Further, the 16*2 display LCD has a backlight, allowing 32 ASCII characters to display. This display has two rows so each row can print 16 characters. The LCD also contains the adapter. Hence the adapter is an 8-bit chip. The adapter is there to convert the I2C data coming from an Arduino into the parallel data that is the need of LCD.
The LCD board has a little potentiometer in blue color to adjust the contrast of the display. Moreover, the jumper is also there to supply power to the backlight Hence the jumper can be removed and an external voltage can be applied to the header pin to control the intensity of the backlight. The LCD has four pins. GND, VCC, SDA, and SCL. SDA is the serial data pin used t transmit and receive data and SCL is the Serial clock pin
Hardware Required
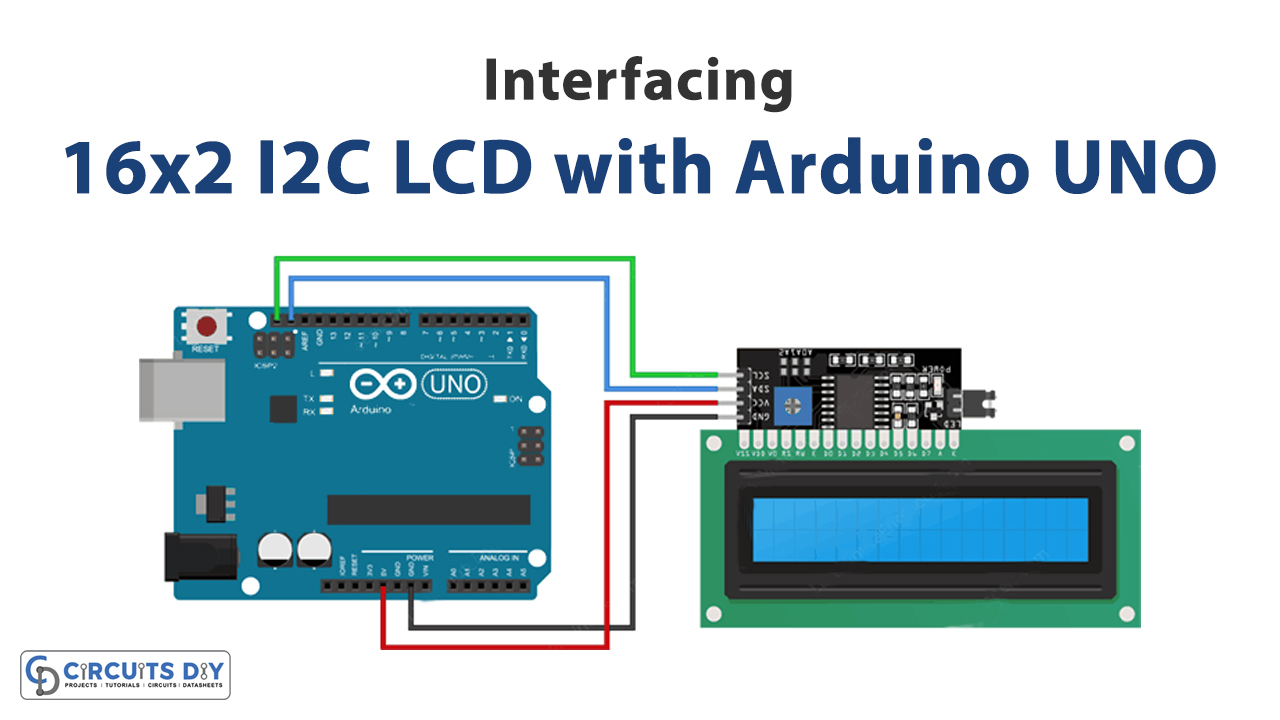
Circuit Diagram
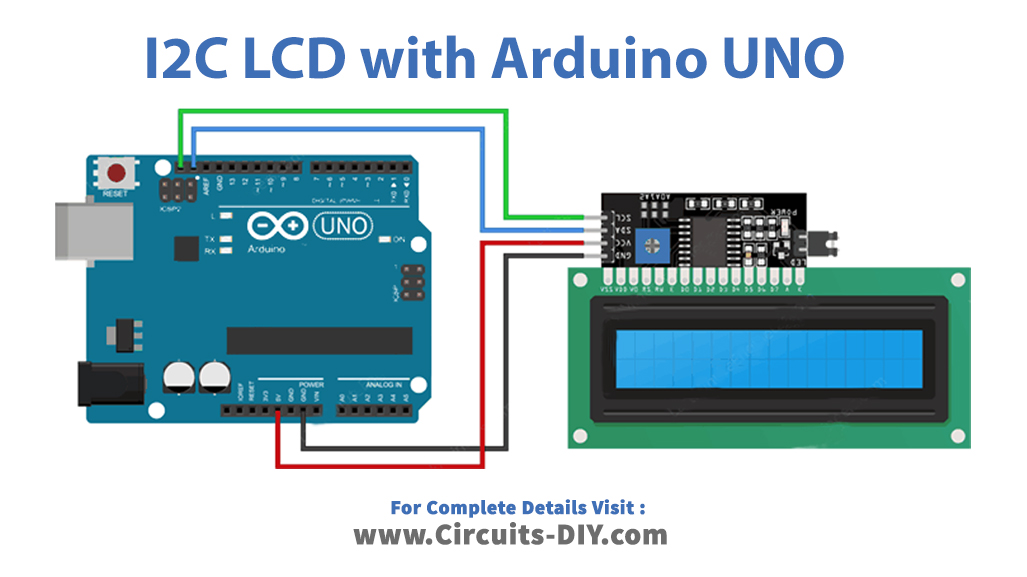
Connection Table
| Arduino | I2C LCD |
|---|---|
| GND | GND |
| 5V | VCC |
| A4 | SDA |
| A5 | SCL |
#include <Wire.h>

void setup() {
  Serial.begin (9600);

  // Leonardo: wait for serial port to connect
  while (!Serial)
    {
    }

  Serial.println ();
  Serial.println ("I2C scanner. Scanning ...");
  byte count = 0;

  Wire.begin();
  for (byte i = 8; i < 120; i++)
  {
    Wire.beginTransmission (i);
    if (Wire.endTransmission () == 0)
      {
      Serial.print ("Found address: ");
      Serial.print (i, DEC);
      Serial.print (" (0x");
      Serial.print (i, HEX);
      Serial.println (")");
      count++;
      delay (1);  // maybe unneeded?
      } // end of good response
  } // end of for loop
  Serial.println ("Done.");
  Serial.print ("Found ");
  Serial.print (count, DEC);
  Serial.println (" device(s).");
}  // end of setup

void loop() {}
Arduino Code
Working Explanation
To interface the I2C LCD with Arduino UNO connect the circuit according to the diagram given above. Write the above-mentioned code of determining the 12C address in your Arduino IDE and upload the code in Arduino UNO. Open the serial monitor and wait until the device is found. After that write the other code to print the message on LCD and upload it too in Arduino. The message will be displayed on the 12c LCD.
Code Explanation
TO PRINT THE MESSAGE:
- Download the liquidCrystal_12C library. You can download the library from:
https://github.com/johnrickman/LiquidCrystal_I2C
- Include the downloaded library. and enter the address of your 12C LCD. using LCD( ).
- In the void setup, initialize the LCD by LCD.init( ). Clear the LCD by LCD.clear. And then turn ON the backlight by using LCD.backlight( ). To print the message, first set the cursor by using LCD. setCursor( A,B). Write the character number of characters at the place of A and line number at the place of B. print the message by using LCD.print( ).
Application and Uses
This device can be used with any device or equipment that needs a display. For example in the weather stations to display the weather conditions. hence can be employed in so many devices.