Introduction
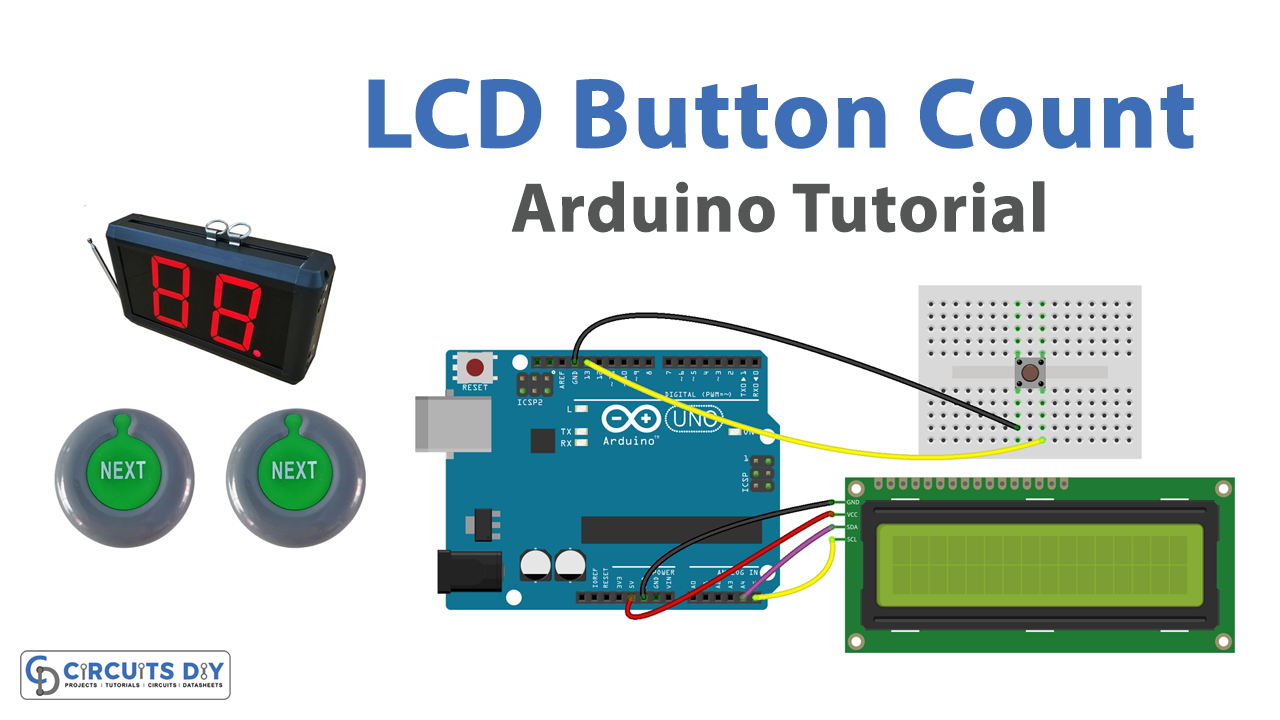
The ability to detect and count the number of times a push button is pressed, and then display the total number of push-button counts on an LCD screen is a useful feature in many electronic projects. This application utilizes an Arduino UNO microcontroller, a push button switch, an I2C 16×2 LCD display module, and the LiquidCrystal_I2C library.
An I2C 16×2 LCD display module for Arduino is a device that allows you to display text, characters, and numbers on a small screen. It is specifically designed to work with the Arduino microcontroller, which makes it easy to interface with and control the display. The device is typically composed of a liquid crystal display (LCD) screen, an I2C backpack, and a set of pin headers.
Hardware Components
You will require the following hardware for LCD Button Count.
| S.no | Component | Value | Qty |
|---|---|---|---|
| 1. | Arduino UNO | – | 1 |
| 2. | USB Cable Type A to B | – | 1 |
| 3. | Button | – | 1 |
| 4. | LED I2C | – | 1 |
| 5. | Power Adapter for Arduino | 9V | 1 |
| 6. | Breadboard | – | 1 |
| 7. | Jumper Wires | – | 1 |
LCD Button Count with Arduino
- Connect the push button switch to a digital input pin on the Arduino UNO, and the I2C LCD display module to the I2C pins (A4 for SDA and A5 for SCL) on the Arduino UNO.
- In the setup() function, start the serial communication using the Serial.begin() function, also initialize the LCD using the LiquidCrystal_I2C library by defining the I2C address and the number of columns and rows of the display.
#include <Wire.h>
#include <LiquidCrystal_I2C.h>
LiquidCrystal_I2C lcd(0x27,16,2); // set the LCD address to 0x27 for a 16 chars and 2 line display
void setup() {
  Serial.begin(9600);
  lcd.begin(); // start the LCD
  lcd.backlight(); // turn on the backlight
}
- In the loop() function, use the digitalRead() function to read the state of the push button. When the push button is pressed, the digitalRead() function returns a value of HIGH. A conditional statement is used to check the state of the button, and if the button is pressed, increment a variable counting the number of button presses.
int buttonPin = 2; // push button connected to digital pin 2
int buttonCount = 0; // variable to store the number of button presses
void loop() {
  if (digitalRead(buttonPin) == HIGH) { // check if the button is pressed
    buttonCount++; // increment the button press count
    delay(50); // debounce delay
  }
- Use the lcd.begin() and lcd.print() functions from the LiquidCrystal_I2C library to display the total number of push button counts on the LCD display.
lcd.clear(); // clear the LCD
lcd.setCursor(0,0); // set the cursor to the first column of the first row
lcd.print("Button Count:"); // print the label
lcd.print(buttonCount); //print the button count
- Upload the program to the Arduino UNO board, and open the serial monitor to verify that the push button count is incrementing correctly.
Schematic
Make connections according to the circuit diagram given below.

Wiring / Connections
| Arduino | Sensor |
|---|---|
| 5V | VCC |
| GND | GND |
| A4 | SDA |
| A5 | SCL |
Installing Arduino IDE
First, you need to install Arduino IDE Software from its official website Arduino. Here is a simple step-by-step guide on “How to install Arduino IDE“.
Installing Libraries
Before you start uploading a code, download and unzip the following libraries at /Progam Files(x86)/Arduino/Libraries (default), in order to use the sensor with the Arduino board. Here is a simple step-by-step guide on “How to Add Libraries in Arduino IDE“.
Code
Now copy the following code and upload it to Arduino IDE Software.
#include <LiquidCrystal_I2C.h>
#include <ezButton.h>
LiquidCrystal_I2C lcd(0x3F, 16, 2); // I2C address 0x3F, 16 column and 2 rows
ezButton button(13);  // create ezButton object that attach to pin 13;
unsigned long lastCount = 0;

void setup() {
  Serial.begin(9600);

  lcd.init();               // initialize the lcd
  lcd.backlight();          // open the backlight

  button.setDebounceTime(50); // set debounce time to 50 milliseconds
  button.setCountMode(COUNT_FALLING);
}

void loop() {
  button.loop(); // MUST call the loop() function first

  unsigned long count = button.getCount();
  if (lastCount != count) {
    Serial.println(count); // print count to Serial Monitor

    lcd.clear();
    lcd.setCursor(0, 0); // start to print at the first row
    lcd.print("Count: ");
    lcd.print(count);

    lastCount != count;
  }
}
Working Explanation
When the Arduino UNO microcontroller runs the code, it enters a loop where it repeatedly reads the state of the push button switch using the digitalRead() function. When the push button is pressed, the digitalRead() function returns a value of HIGH, and a conditional statement is used to check for this value.
When the button is pressed, the code increments a variable counting the number of button presses and then debounces the button press to prevent multiple counts from a single press. Then the code uses the lcd.begin() and lcd.print() functions from the LiquidCrystal_I2C library to display the total number of button presses on the LCD display.
Applications
- Home Automation
- Robotics
- DIY projects
- Safety systems
- Industrial Control Systems
- Research and Development
Conclusion.
We hope you have found this Button Count LCD Tutorial useful. If you feel any difficulty in making it feel free to ask anything in the comment section.
Related posts:
 How to Interface 2 Channel Relay Module with Arduino UNO
 LSM303 Triple-Axis Accelerometer Magnetometer Module with Arduino
 Automation using TSOP 1738 And Arduino
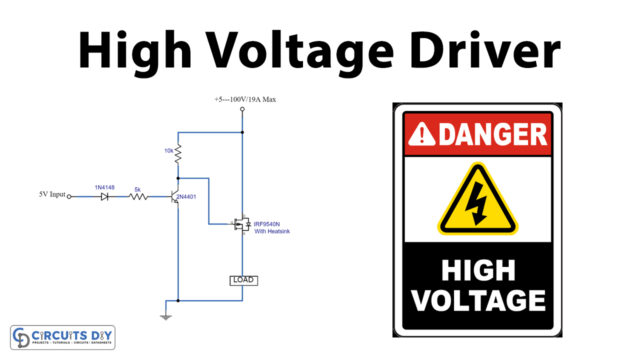 Arduino High Voltage Driver Circuit Using IRF9540 Power MOSFET
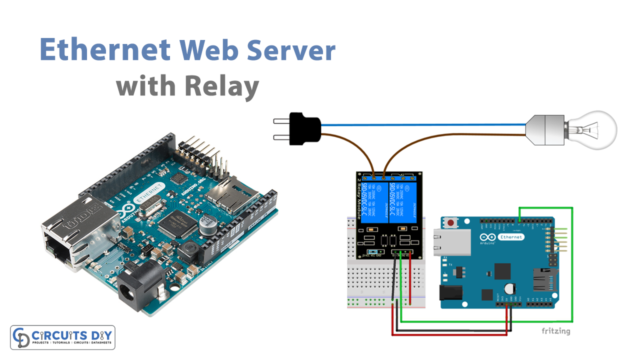 How to Interface Arduino Ethernet Web Server with Relay
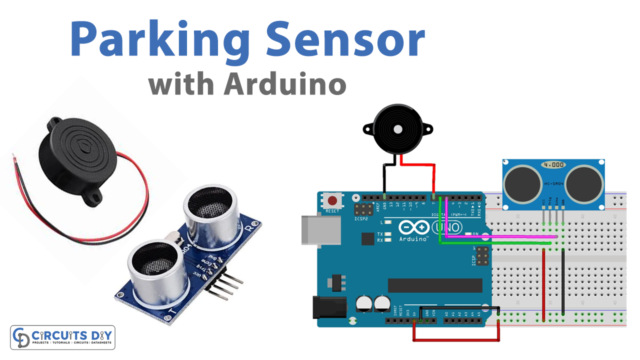 Parking Sensor with Arduino