Introduction
Solid particles that are suspended in the atmosphere for a certain period make up dust. These particles can be formed of inorganic materials like glass, stone, or metal or organic materials like bacteria, wood, fungal spores, or flour. The microparticles in the air are respirable, which means they are tiny enough to penetrate the human body and reside in the lungs or even reach circulation. This might have harmful effects on our health. The proper management of fine dust is consequently a significant task. And, therefore fine dust analyzers are there. In this article, we will talk about Portable Fine Dust PM10 Analyzer with Large OLED Digits
Fine dust is also a problem in the semiconductor industry. Environmental Experts are providing improved solutions that have been studied and tested over so many years. However, engineers must also contribute, which is why sensors are provided to find that tiny dust.
What is a Fine Dust Analyzer?
A fine dust analyzer is a device used to monitor the concentration of dust or fine particles suspended in the exhaust gas as it passes through a duct, stack, or flue; commonly, exhaust gas from an industrial combustion process or air filtering system.
Hardware Components
You will require the following hardware for Portable Fine Dust PM10 Analyzer with Large OLED Digits.
| S.no | Component | Value | Qty |
|---|---|---|---|
| 1. | Arduino UNO | – | 1 |
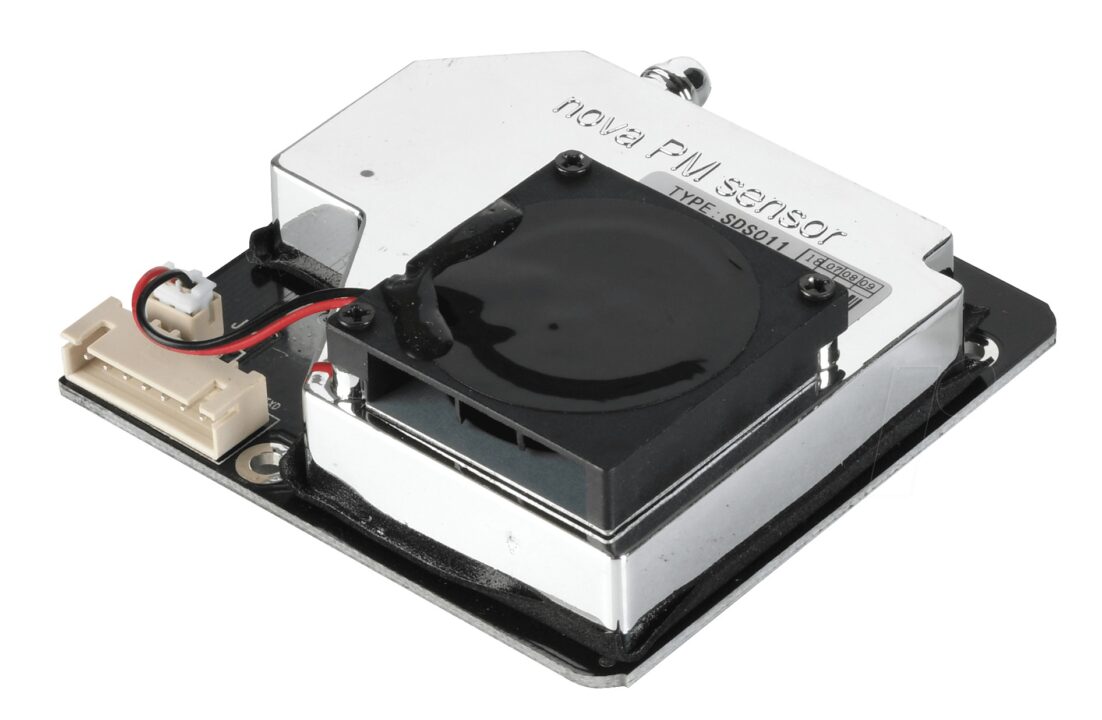
| 2. | Air Quality Detection Sensor | SDS011 | 1 |
| 3. | Graphic OLED | 128X64 | 1 |
| 4. | Breadboard | – | 1 |
| 5. | Jumper Wires | – | 1 |
Steps for Making a Portable Fine Dust Analyzer
Follow the above table to bring the components that would be used in this project. After that, follow the given steps:
Schematic
Make connections according to the circuit diagram given below.
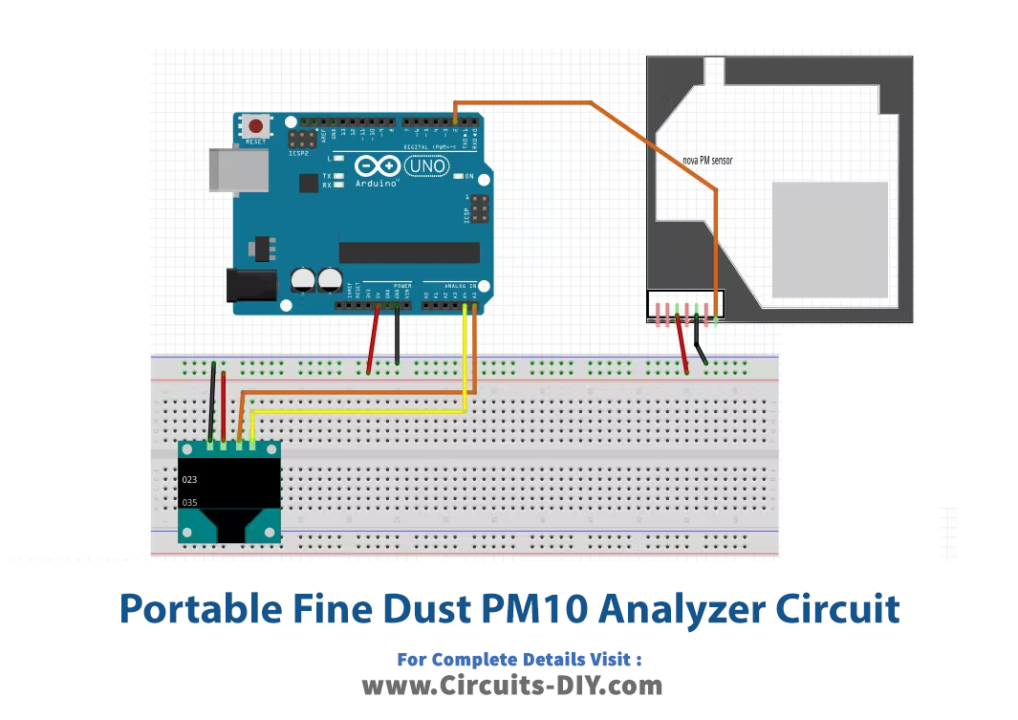
Wiring / Connections
| Arduino | OLED LCD | Air Sensor |
|---|---|---|
| 5V | VCC | VCC |
| GND | GND | GND |
| A4 | SDA | |
| A5 | SCL | |
| D2 | TX |
Installing Arduino IDE
First, you need to install Arduino IDE Software from its official website Arduino. Here is a simple step-by-step guide on “How to install Arduino IDE“.
Installing Libraries
Before you start uploading a code, download and unzip the following libraries at /Progam Files(x86)/Arduino/Libraries (default) to use the sensor with the Arduino board. Here is a simple step-by-step guide on “How to Add Libraries in Arduino IDE“.
Code
Now copy the following code and upload it to Arduino IDE Software.
#include "SoftwareSerial.h"
SoftwareSerial mySerial(2, 3); // RX, TX for SDS011 sensor ( to keep Serial monitor available )

#include "U8glib.h"
U8GLIB_SSD1306_128X64 u8g(U8G_I2C_OPT_NONE);  // for 1306 type OLED, I2C / TWI

// Global Variables
static unsigned char buf[7], buffSDS[25];
unsigned int PM2_5,PM10=0;

// Sub Routines

// Update OLED Display
void draw(void) {
  /* for the line with PM2.5 value */
  if ( PM2_5>999 ) PM2_5=999 ;// overflow is 999
  val_to_string(PM2_5);

  u8g.setFont(u8g_font_fub30);// Large font
  u8g.drawStr( 0, 31, buf); //
  u8g.setFont(u8g_font_unifont);
  u8g.drawStr( 75, 10, "PM2.5");
  buf[0]='µ';
  buf[1] = '\0';
  u8g.drawStr( 75, 10+2+10, buf);
  u8g.drawStr( 82, 10+2+10, "g/m3");

  // for the line with PM10 value
  if ( PM10>999 ) PM10=999 ;// overflow
  val_to_string(PM10);

  u8g.setFont(u8g_font_fub30);// Large font
  u8g.drawStr( 0, 65, buf); //
  u8g.setFont(u8g_font_unifont);
  u8g.drawStr( 75, 34+10, "PM10");
  buf[0]='µ';
  buf[1] = '\0';
  u8g.drawStr( 75, 34+10+2+10, buf);
  u8g.drawStr( 82, 34+10+2+10, "g/m3");
}


/* convert int into buf[] to BCD string to be OLED printed */
void val_to_string(int val){

  int deca[5];
  deca[4]=10000;
  deca[3]=1000;
  deca[2]=100;
  deca[1]=10;
  deca[0]=1;

  char digit[10];
  digit[0]='0';
  digit[1]='1';
  digit[2]='2';
  digit[3]='3';
  digit[4]='4';
  digit[5]='5';
  digit[6]='6';
  digit[7]='7';
  digit[8]='8';
  digit[9]='9';

  buf[0]='0';
  buf[1]='0';
  buf[2]='0';
  buf[3]='\0'; // string terminator, only 3 digits needed
  buf[4]='0';
  buf[5] = '\0'; // not used

  for ( int8_t i=2; i>=0 ; i=i-1 )
  {
    byte d=0;
    while (( val-deca[i]) >= 0)
    { val=val-deca[i];
      buf[2-i]=digit[++d];
    }
  }
}


void setup() {
  // put your setup code here, to run once:

// init 1306 I2C OLED
 u8g.setColorIndex(1); // monochrome

// Read SDS011 on Serial
mySerial.begin(9600);  //
mySerial.setTimeout(200);
mySerial.readBytesUntil(0xAB,buffSDS,20); // read serial until 0xAB Char received

// Serial Monitor
Serial.begin(115200);
}


void loop() {
  // put your main code here, to run repeatedly:

 // LCD Update
  u8g.firstPage();
  do {
    draw();
  } while( u8g.nextPage() );

// Read SDS011
mySerial.readBytesUntil(0xAB,buffSDS,20);

// Serial monitor, print the HEX bytes received in buffSDS
//Serial.write(buffSDS,10);
for ( int8_t i=0; i<10 ; i=i+1 )
  {
  Serial.print( buffSDS[i],HEX);
  Serial.print(" ");
  }
Serial.println("");


PM2_5 = ((buffSDS[3]*256)+buffSDS[2])/10; // extract PM2.5 value
Serial.print("PM2.5: ");
Serial.println(PM2_5);

PM10 = ((buffSDS[5]*256)+buffSDS[4])/10; // extract PM10 value
Serial.print("PM10: ");
Serial.println(PM10);

delay(500);
}
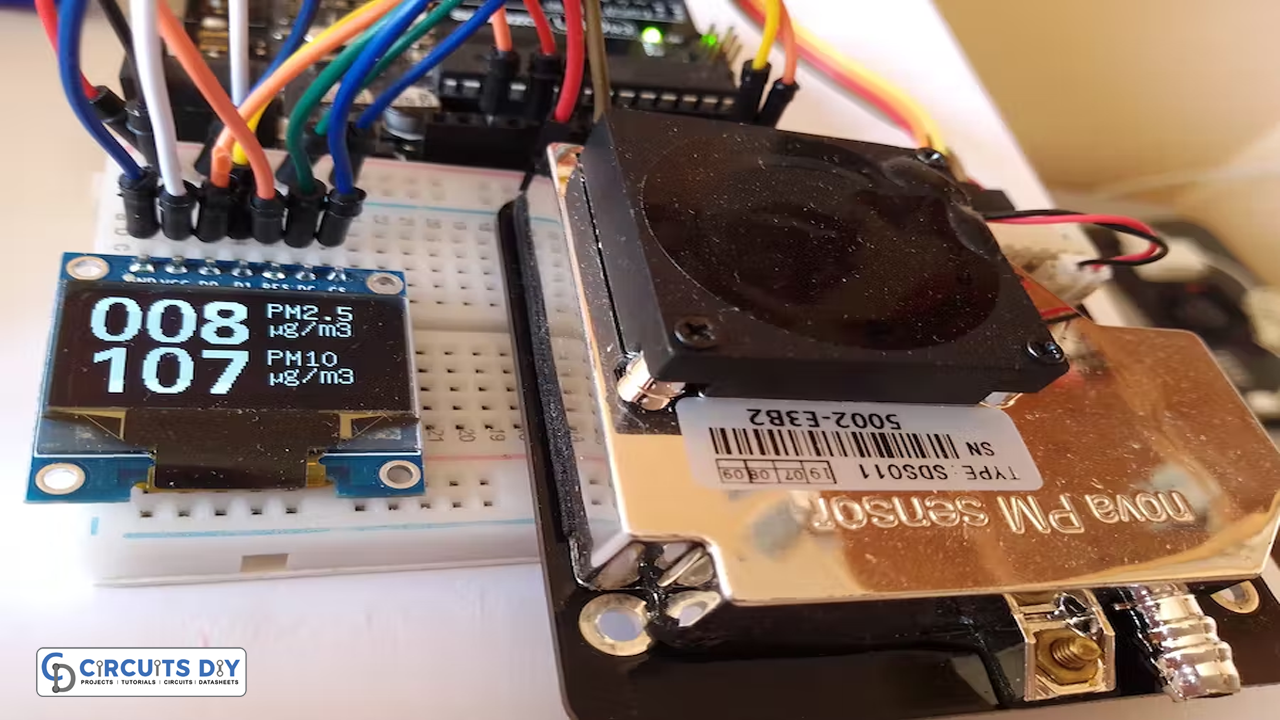
Let’s Test It
It’s now time to test the circuit. Once the Arduino gets the power; the reading started to appear on the screen. Wait for a more polluted day to compare your measurements.
Working Explanation
To understand the working of the circuit one must need to understand how the sensor works. The laser light and a diode for detection are the key components of the sensor. Both of them are confined within the enclosure, so they are not impacted by outside light. The fan draws air from the port and directs it between the laser and the diode. Then it is pushed out from the top. The amount of light that falls on the diode is determined by the amount of particulate matter in the air. This signal is subsequently amplified and processed to get the final output. Now that you are aware of how this sensor functions, understand that using an Arduino to obtain the output data is important, which is why we created the code above.
Applications
- Air filtered processes
- Industrial applications; etc
Conclusion
We hope you have found this Portable Fine Dust PM10 Analyzer with Large OLED Digits Circuit very useful if you feel any difficulty making it feel free to ask anything in the comment section.