Introduction
Since temperature and humidity are two of the main environmental factors, they also have an impact on human lives. As a result, measuring them is critically vital. Application areas for temperature measuring range from assessing the condition of rivers and streams to ensuring the accuracy of sterilizing processes. Measuring humidity is crucial for both managing and forecasting indoor and outdoor weather. Controlling humidity is crucial in places like homes, warehouses, and industries. To keep this all in mind we have decided to make a Portable “Temperature/Humidity Sensor” with LCD & Arduino.
Sensors for humidity and temperature are important roles in many fields in our environment. These sensors can measure both the air temperature and the amount of water vapor in the air. However, what are they and how do they operate? We will go over all the information you need to know about as you continue to read this post.
What is a Portable Temperature Humidity Sensor?
Devices called temperature and humidity sensors can turn temperature and humidity into electrical signals that may be used to detect temperature and humidity with ease. Market-available temperature and relative humidity transmitters typically measure the air’s temperature and relative humidity, convert it into electrical signals or other signal types by predetermined rules, and output the data to a device or software to satisfy users’ needs for environmental monitoring.
Hardware Components
You will require the following hardware to make a Portable Temperature/Humidity Sensor.
| S.no | Component | Value | Qty |
|---|---|---|---|
| 1. | Arduino | UNO | 1 |
| 2. | Temperature Sensor | DHT11 | 1 |
| 3. | RGB Backlight LED | 16×2 | 1 |
| 4. | Potentiometer | 10K | 1 |
| 5. | Pushbutton switch | 12mm | 1 |
| 6. | Resistor | 10KΩ | 1 |
| 7. | Breadboard | – | 1 |
| 8. | Jumper Wires | – | 1 |
Steps for Making a Portable Temperature/Humidity Sensor
Only the Arduino, the provided sensor, the LCD, and a very small number of readily accessible electronic components are needed to build this portable temperature/humidity sensor with LCD and Arduino. After that, you must complete the following steps:
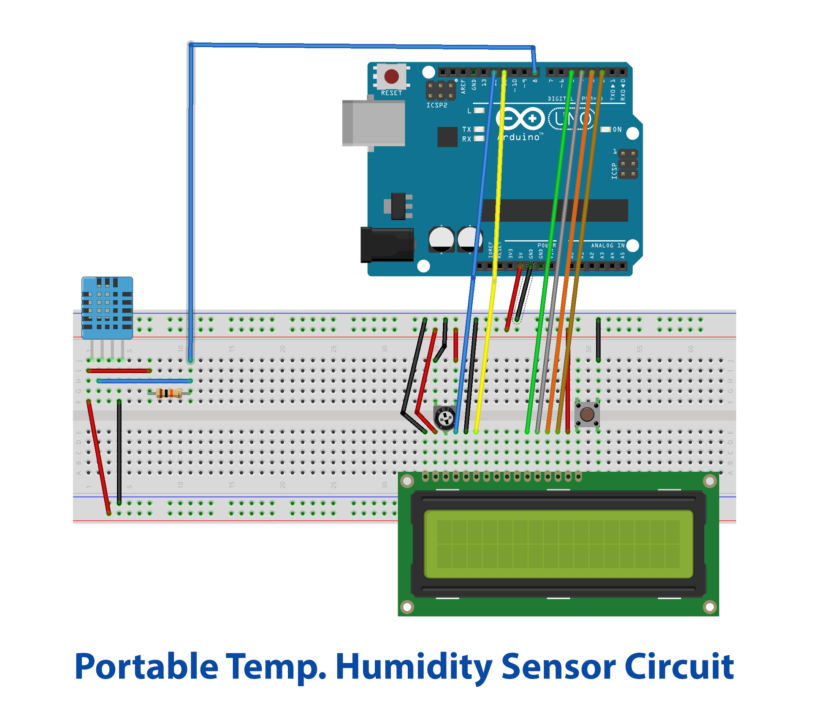
Schematic
Make connections according to the circuit diagram given below.
Installing Arduino IDE
First, you need to install Arduino IDE Software from its official website Arduino. Here is a simple step-by-step guide on “How to install Arduino IDE“.
Installing Libraries
Before you start uploading a code, download and unzip the following libraries at /Progam Files(x86)/Arduino/Libraries (default), to use the sensor with the Arduino board. Here is a simple step-by-step guide on “How to Add Libraries in Arduino IDE“.
Code
Now copy the following code and upload it to Arduino IDE Software.
// include the library code:
#include <LiquidCrystal.h>
#include "DHT.h"
// set the DHT Pin
#define DHTPIN 8
// initialize the library with the numbers of the interface pins
LiquidCrystal lcd(12, 11, 5, 4, 3, 2);
#define DHTTYPE DHT11
DHT dht(DHTPIN, DHTTYPE);
void setup() {
// set up the LCD's number of columns and rows:
lcd.begin(16, 2);
dht.begin();
// Print a message to the LCD.
lcd.print("Temp: Humidity:");
}
void loop() {
delay(500);
// set the cursor to column 0, line 1
// (note: line 1 is the second row, since counting begins with 0):
lcd.setCursor(0, 1);
// read humidity
float h = dht.readHumidity();
//read temperature in Fahrenheit
float f = dht.readTemperature(true);
if (isnan(h) || isnan(f)) {
lcd.print("ERROR");
return;
}
lcd.print(f);
lcd.setCursor(7,1);
lcd.print(h);
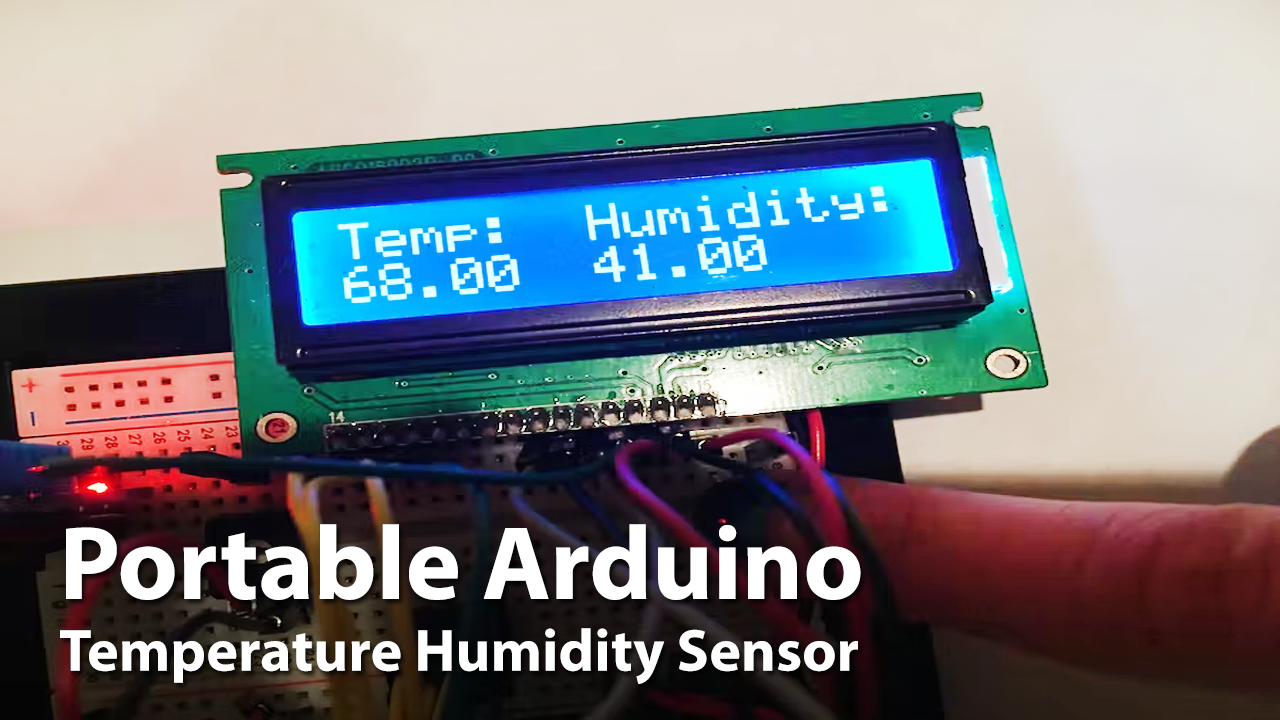
}Let’s Test It
Now that we have made the connections and uploaded the code, it’s time to test the results. For this, power your Arduino. You will see the readings coming to the LCD screen.
Working Explanation
To understand the working you need to understand the code first:
- We first have included the required libraries that need to be there to communicate to the sensor and LCD. After this, we define the Arduino pin that is connected to the sensor. Then we make an LCD object and define Arduino pins that are connected to the LCD. The DHT object instance must then be created with the correct DHT type and connection. We utilize the function for this. DHT(pin,type) . We called the sensor dht in this example.
- We initiate a serial communication with the LCD in the void setup by providing lcd.begin (). Using dht.begin() we also initialize the sensor.
- In the void loop, after giving some delay, By using the function lcd.setCursor(), we set the cursor to display reading on an LCD to column 0 and line 1. Given that counting starts at 0, line 1 is the second row. We then provide dht.readHumidity(); dht.readTemperature() functions to read the humidity and temperature. We stored their float values. Next, we look to see if the temperature or humidity readings are unusual. The LCD then shows the message “error” in that situation. A value’s status as a Not-a-Number is determined by the isnan () function. In the event that the value is NaN, this method returns true. If not, false is returned. If the values are normal, they will be displayed on the LCD screen.
Applications
- Calculating temperature and humidity values for heating.
- systems for ventilation and temperature controls.
- Weather stations.
Conclusion.
We hope you have found this Portable Temperature Humidity Sensor very useful. If you feel any difficulty in making it feel free to ask anything in the comment section.