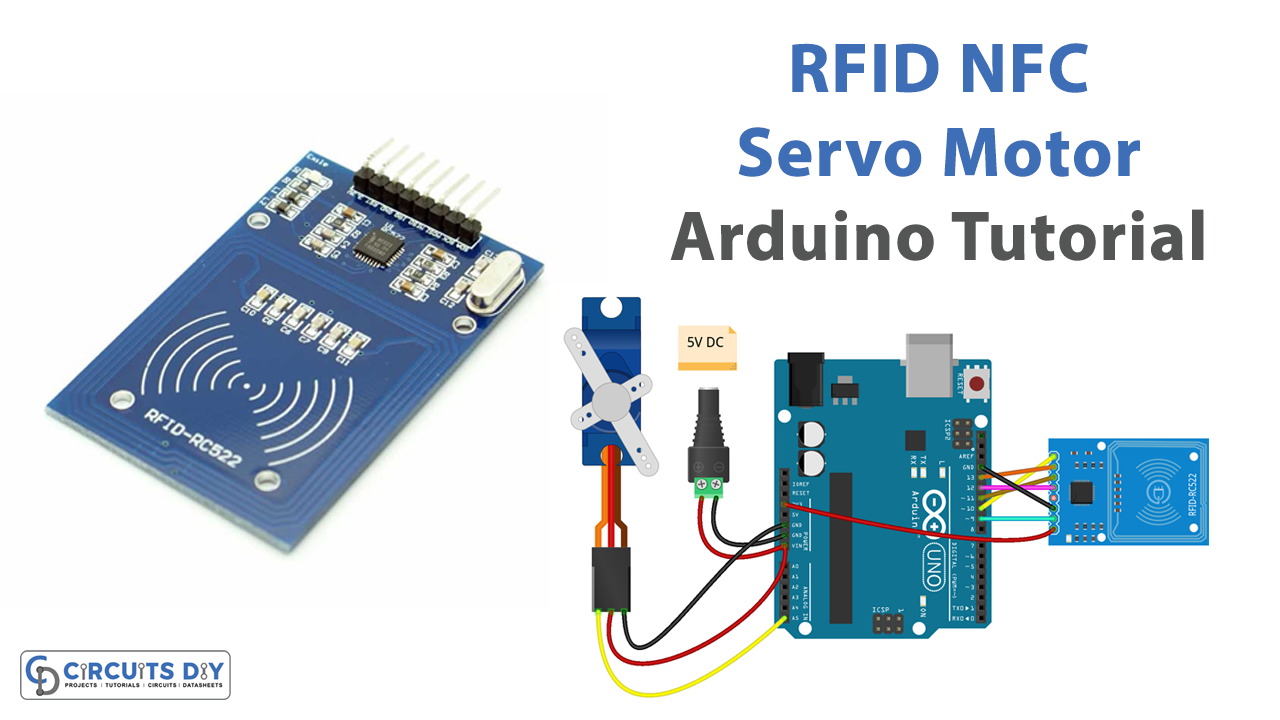
Introduction
Controlling a servo motor with an RFID card is a great way to add an extra layer of security or automation to a project. The combination of an RFID card reader and an Arduino Uno microcontroller allows for easy integration of this functionality into a wide range of projects. With an RFID card reader, a user can simply swipe their card in front of the reader to activate the servo motor and perform a specific action.
In this tutorial, we will go over the steps for writing the code to control an SG51R servo motor with an MFRC522 RC522 RFID card reader using an Arduino Uno microcontroller.
Hardware Components
You will require the following hardware for RFID/NFC Servo Motor with Arduino.
| S.no | Component | Value | Qty |
|---|---|---|---|
| 1. | Arduino UNO | – | 1 |
| 2. | USB Cable Type A to B | – | 1 |
| 3. | RFID/NFC Kit (reader + tags) | RC522 | 1 |
| 4. | Servo Motor | – | 1 |
| 5. | Power Adapter | 5V | 1 |
| 6. | DC Power Jack | – | 1 |
| 7. | Power Adapter for Arduino | 9V | 1 |
| 8. | Jumper Wires | – | 1 |
RFID/NFC Servo Motor with Arduino
- Start by including the Servo and MFRC522 library in the code.
#include <Servo.h>
#include <MFRC522.h>
- Declare the Servo object and the MFRC522 object, and also the pin numbers that the servo and MFRC522 is connected to.
Servo myservo;
#define SS_PIN 10
#define RST_PIN 9
int servoPin = 3;
- In the setup() function, initialize the serial communication at a specific baud rate and attach the servo object to the desired pin. Also, initialize the MFRC522 object by setting the SS and RST pin.
Serial.begin(9600);
myservo.attach(servoPin);
MFRC522 mfrc522(SS_PIN, RST_PIN);
- In the loop() function, use the MFRC522.PICC_IsNewCardPresent() function to check if a new card is present and the MFRC522.PICC_ReadCardSerial() function to read the card’s UID and store it in a variable.
if (mfrc522.PICC_IsNewCardPresent()) {
    MFRC522::PICC_Type piccType = mfrc522.PICC_ReadCardSerial();
    byte* uid = mfrc522.uid.uidByte;
}
- Compare the UID of the card to a pre-defined UID and if it matches, use the servo.write() function to move the servo to a specific angle.
if (uid[0] == 0xDE && uid[1] == 0xAD && uid[2] == 0xBE && uid[3] == 0xEF) {
    myservo.write(90);
}
- Use the Serial.println() function to post the status of the servo on the serial monitor.
Serial.println("Access granted!");
- Use the delay() function to pause the program for a specific amount of time to let the servo reach its target angle.
delay(1000);
- Repeat the process in the loop() function to continuously check for new cards.
while(1){ if (mfrc522.PICC_IsNewCardPresent())
{
        // Select one of the cards
        if (mfrc522.PICC_ReadCardSerial()) {
            byte* uid = mfrc522.uid.uidByte;
            // Check if the card's UID matches the pre-defined UID
            if (uid[0] == 0xDE && uid[1] == 0xAD && uid[2] == 0xBE && uid[3] == 0xEF) {
                // Move the servo to the desired angle
                myservo.write(90);
                // Print a message on the serial monitor
                Serial.println("Access granted!");
                // Pause the program for 1 second
                delay(1000);
}
else {
                // Print a message on the serial monitor
                Serial.println("Access denied!");
            }
        }
    }}
Schematic
Make connections according to the circuit diagram given below.
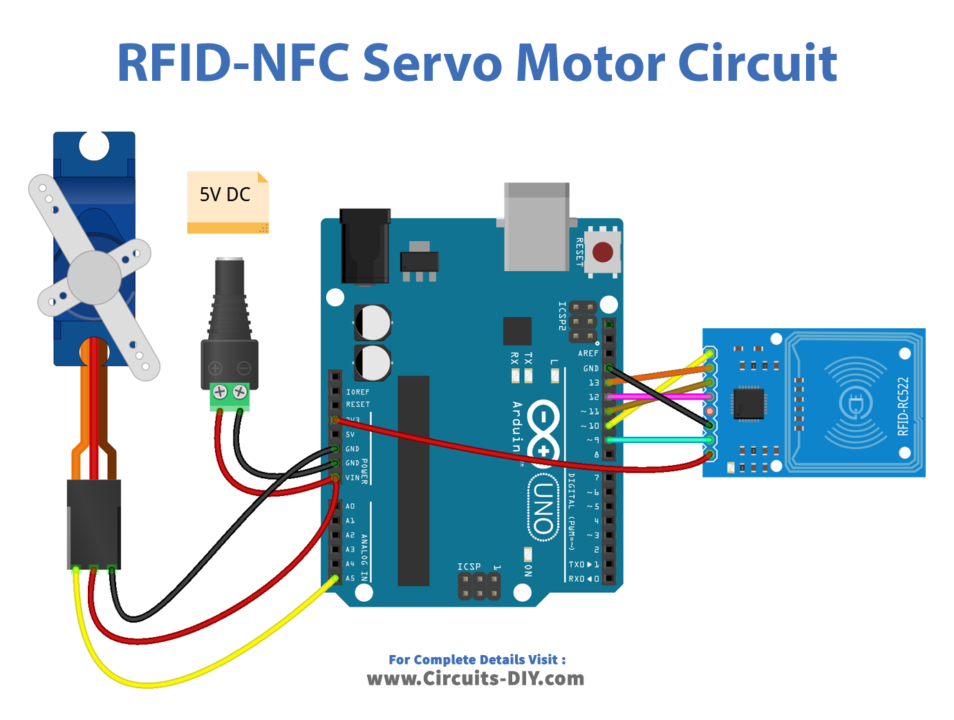
Wiring / Connections
| Arduino | Motor | RFID/NFC |
|---|---|---|
| GND | GND | GND |
| 5v | VCC | VCC |
| D9 | RST | |
| D12 | MISO | |
| D11 | MOSI | |
| D13 | SCK | |
| D10 | SS | |
| A5 | YELLOW |
Installing Arduino IDE
First, you need to install Arduino IDE Software from its official website Arduino. Here is a simple step-by-step guide on “How to install Arduino IDE“.
Installing Libraries
Before you start uploading a code, download and unzip the following libraries at /Progam Files(x86)/Arduino/Libraries (default), in order to use the sensor with the Arduino board. Here is a simple step-by-step guide on “How to Add Libraries in Arduino IDE“.
Code
Now copy the following code and upload it to Arduino IDE Software.
Arduino Code – Single RFID/NFC Tag
#include <SPI.h>
#include <MFRC522.h>
#include <Servo.h>

#define SS_PIN    10
#define RST_PIN   9
#define SERVO_PIN A5

MFRC522 rfid(SS_PIN, RST_PIN);
Servo servo;

byte authorizedUID[4] = {0xFF, 0xFF, 0xFF, 0xFF};
int angle = 0; // the current angle of servo motor

void setup() {
  Serial.begin(9600);
  SPI.begin(); // init SPI bus
  rfid.PCD_Init(); // init MFRC522
  servo.attach(SERVO_PIN);
  servo.write(angle); // rotate servo motor to 0°

  Serial.println("Tap RFID/NFC Tag on reader");
}

void loop() {
  if (rfid.PICC_IsNewCardPresent()) { // new tag is available
    if (rfid.PICC_ReadCardSerial()) { // NUID has been readed
      MFRC522::PICC_Type piccType = rfid.PICC_GetType(rfid.uid.sak);

      if (rfid.uid.uidByte[0] == authorizedUID[0] &&
          rfid.uid.uidByte[1] == authorizedUID[1] &&
          rfid.uid.uidByte[2] == authorizedUID[2] &&
          rfid.uid.uidByte[3] == authorizedUID[3] ) {
        Serial.println("Authorized Tag");

        // change angle of servo motor
        if (angle == 0)
          angle = 90;
        else //if(angle == 90)
          angle = 0;

        // control servo motor arccoding to the angle
        servo.write(angle);
        Serial.print("Rotate Servo Motor to ");
        Serial.print(angle);
        Serial.println("°");
      } else {
        Serial.print("Unauthorized Tag with UID:");
        for (int i = 0; i < rfid.uid.size; i++) {
          Serial.print(rfid.uid.uidByte[i] < 0x10 ? " 0" : " ");
          Serial.print(rfid.uid.uidByte[i], HEX);
        }
        Serial.println();
      }

      rfid.PICC_HaltA(); // halt PICC
      rfid.PCD_StopCrypto1(); // stop encryption on PCD
    }
  }
}
Arduino Code – Multiple RFID/NFC Tags
#include <SPI.h>
#include <MFRC522.h>
#include <Servo.h>

#define SS_PIN    10
#define RST_PIN   9
#define SERVO_PIN A5

MFRC522 rfid(SS_PIN, RST_PIN);
Servo servo;

byte authorizedUID1[4] = {0x3A, 0xC9, 0x6A, 0xCB};
byte authorizedUID2[4] = {0x30, 0x01, 0x8B, 0x15};

int angle = 0; // the current angle of servo motor

void setup() {
  Serial.begin(9600);
  SPI.begin(); // init SPI bus
  rfid.PCD_Init(); // init MFRC522
  servo.attach(SERVO_PIN);
  servo.write(angle); // rotate servo motor to 0°

  Serial.println("Tap RFID/NFC Tag on reader");
}

void loop() {
  if (rfid.PICC_IsNewCardPresent()) { // new tag is available
    if (rfid.PICC_ReadCardSerial()) { // NUID has been readed
      MFRC522::PICC_Type piccType = rfid.PICC_GetType(rfid.uid.sak);

      if (rfid.uid.uidByte[0] == authorizedUID1[0] &&
          rfid.uid.uidByte[1] == authorizedUID1[1] &&
          rfid.uid.uidByte[2] == authorizedUID1[2] &&
          rfid.uid.uidByte[3] == authorizedUID1[3] ) {
        Serial.println("Authorized Tag 1");
        changeServo();
      } else if (rfid.uid.uidByte[0] == authorizedUID2[0] &&
                 rfid.uid.uidByte[1] == authorizedUID2[1] &&
                 rfid.uid.uidByte[2] == authorizedUID2[2] &&
                 rfid.uid.uidByte[3] == authorizedUID2[3] ) {
        Serial.println("Authorized Tag 2");
        changeServo();
      } else {
        Serial.print("Unauthorized Tag with UID:");
        for (int i = 0; i < rfid.uid.size; i++) {
          Serial.print(rfid.uid.uidByte[i] < 0x10 ? " 0" : " ");
          Serial.print(rfid.uid.uidByte[i], HEX);
        }
        Serial.println();
      }

      rfid.PICC_HaltA(); // halt PICC
      rfid.PCD_StopCrypto1(); // stop encryption on PCD
    }
  }
}

void changeServo() {
  // change angle of servo motor
  if (angle == 0)
    angle = 90;
  else //if(angle == 90)
    angle = 0;

  // control servo motor arccoding to the angle
  servo.write(angle);
  Serial.print("Rotate Servo Motor to ");
  Serial.print(angle);
Serial.println("°");
}
Working Explanation
The code starts by including the necessary libraries, such as the Servo library for controlling the servo motor and the MFRC522 library for reading data from the RFID card. In the setup() function, the code initializes the MFRC522 and Servo objects and sets the pin numbers for the RFID reader and servo motor. It also starts the serial communication at a specific baud rate to be able to send data to the serial monitor.
In the loop() function, the code continuously checks for the presence of an RFID card using the MFRC522’s available functions, such as ‘PICC_IsNewCardPresent()’ and ‘PICC_ReadCardSerial()’. If an RFID card is detected, the servo motor is moved to a specific position using the Servo object’s ‘write()’ function. The servo’s position could be determined by the unique ID of the RFID card read.
Applications
- Access control
- Inventory management
- Robotics
- Security systems
- Automation of a model or simulation
Conclusion.
We hope you have found this RFID/NFC Servo Motor Circuit very useful. If you feel any difficulty in making it feel free to ask anything in the comment section.