Introduction
A Touch Sensor controlled LED is a circuit that uses a TTP223B touch sensor to control the state of an LED. When the touch sensor is pressed, the LED is turned on, and when the touch sensor is released, the LED is turned off.
In most design schemes, the touch sensor sends a digital signal to the microcontroller (in this case, an Arduino UNO), which reads the signal and decides whether to turn the LED on or off based on the state of the touch sensor. The Arduino UNO microcontroller controls the LED through a digital output pin, which can either be set to a high voltage (to turn the LED on) or a low voltage (to turn the LED off).
Hardware Components
You will require the following hardware for the Touch Sensor with Arduino.
| S.no | Component | Value | Qty |
|---|---|---|---|
| 1. | Arduino UNO | – | 1 |
| 2. | USB Cable Type A to B | – | 1 |
| 3. | Touch Sensor | – | 1 |
| 4. | 9V Power Adapter for Arduino | – | 1 |
| 5. | LED | – | 1 |
| 6. | Resistor | 220Ω | 1 |
| 7. | Breadboard | – | 1 |
| 8. | Jumper Wires | – | 1 |
Touch Sensor Arduino
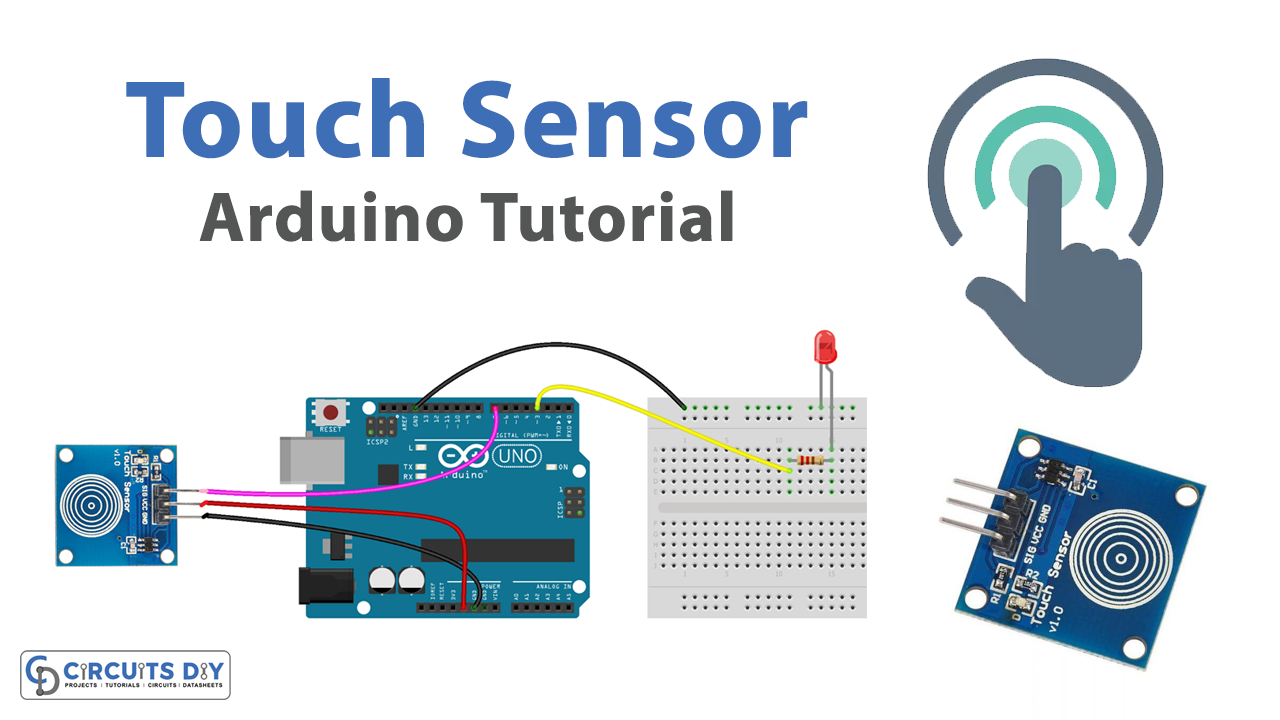
- Connect the TTP223B Touch Sensor to the Arduino UNO microcontroller. The TTP223B Touch Sensor has four pins: VCC, GND, D0, and D1. Connect the VCC pin to the 3.3V or 5V pin on the Arduino, the GND pin to a GND pin on the Arduino, and the D0 pin to a digital input pin on the Arduino (e.g. pin 2).
- Connect the LED to the Arduino UNO microcontroller. The LED has two pins: an anode and a cathode. Connect the anode pin to a digital output pin on the Arduino (e.g. pin 13) and the cathode pin to a GND pin on the Arduino.
- Open the Arduino IDE and create a new sketch (File > New).
- In the sketch, define the variables for the touch sensor pin and the LED pin. For example:
const int touchSensorPin = 2;const int ledPin = 13;
- In the
setupfunction, set the touch sensor pin as an input and the LED pin as an output using thepinModefunction. For example:
pinMode(touchSensorPin, INPUT);
pinMode(ledPin, OUTPUT);
- In the
loopfunction, read the state of the touch sensor using thedigitalReadfunction and store the value in a variable. For example:
int touchSensorState = digitalRead(touchSensorPin);
- Use an
ifstatement to check the value of the touch sensor state. If the touch sensor is pressed (i.e. the state isHIGH), turn on the LED using thedigitalWritefunction. If the touch sensor is not pressed (i.e. the state isLOW), turn off the LED. For example:
if (touchSensorState == HIGH) {
  digitalWrite(ledPin, HIGH);
} else {
  digitalWrite(ledPin, LOW);
}
- Upload the sketch to the Arduino UNO microcontroller using the Arduino IDE (Sketch > Upload).
- Test the touch sensor by pressing and releasing it. The LED should turn on and off as the touch sensor is pressed and released.
Schematic
Make connections according to the circuit diagram given below.

Wiring / Connections
| Arduino | Touch Sensor |
|---|---|
| 5V | VCC |
| GND | GND |
| D7 | SIG |
Installing Arduino IDE
First, you need to install Arduino IDE Software from its official website Arduino. Here is a simple step-by-step guide on “How to install Arduino IDE“.
Code
Now copy the following code and upload it to Arduino IDE Software.
const int TOUCH_SENSOR_PIN  = 2; // Arduino pin connected to the OUTPUT pin of touch sensor
const int LED_PIN           = 3; // Arduino pin connected to LED's pin

void setup() {
  Serial.begin(9600);               // initialize serial
  pinMode(TOUCH_SENSOR_PIN, INPUT); // set arduino pin to input mode
  pinMode(LED_PIN, OUTPUT);         // set arduino pin to output mode
}

void loop() {
  int touchState = digitalRead(TOUCH_SENSOR_PIN); // read new state

  if (touchState == HIGH) {
    Serial.println("The sensor is being touched");;
    digitalWrite(LED_PIN, HIGH); // turn on
  }
  else
  if (touchState == LOW) {
    Serial.println("The sensor is untouched");
    digitalWrite(LED_PIN, LOW);  // turn off
  }
}
Working Explanation
The code for a TTP223B touch sensor-controlled LED using an Arduino UNO microcontroller works by using the touch sensor as an input and the LED as an output. The touch sensor is connected to a digital input pin on the Arduino, and the LED is connected to a digital output pin.
In the void setup() function, the touch sensor pin and LED pin are set as inputs and outputs, respectively, using the pinMode() function. In the void loop() function, the state of the touch sensor is read using the digitalRead() function. If the touch sensor is pressed, the digitalWrite() function is used to set the LED pin to a high voltage, turning the LED on. If the touch sensor is not pressed, the digitalWrite() function is used to set the LED pin to a low voltage, turning the LED off.
Applications
- Door locks
- Security systems
- Touch-sensitive medical equipment
- Touch-sensitive industrial equipment
- Public kiosks
Conclusion.
We hope you have found this Touch Sensor Circuit very useful. If you feel any difficulty in making it feel free to ask anything in the comment section.